
Fable Engineering #4 — From Sketch to Product in Days, not Weeks
How we prototype hardware at software speed — marrying vibe‑coding with rapid mechatronics to turn ideas into working robots in days, not weeks.

The premise: vibe‑coding hasn’t reached hardware… yet
In software, you can spin up a dev server, tweak a few lines, and “feel” your product evolving in real time. Call it vibe‑coding: short, playful loops that privilege momentum over ceremony. In hardware, the folklore says you can’t do that — parts, prints, shipping delays, long lead times.
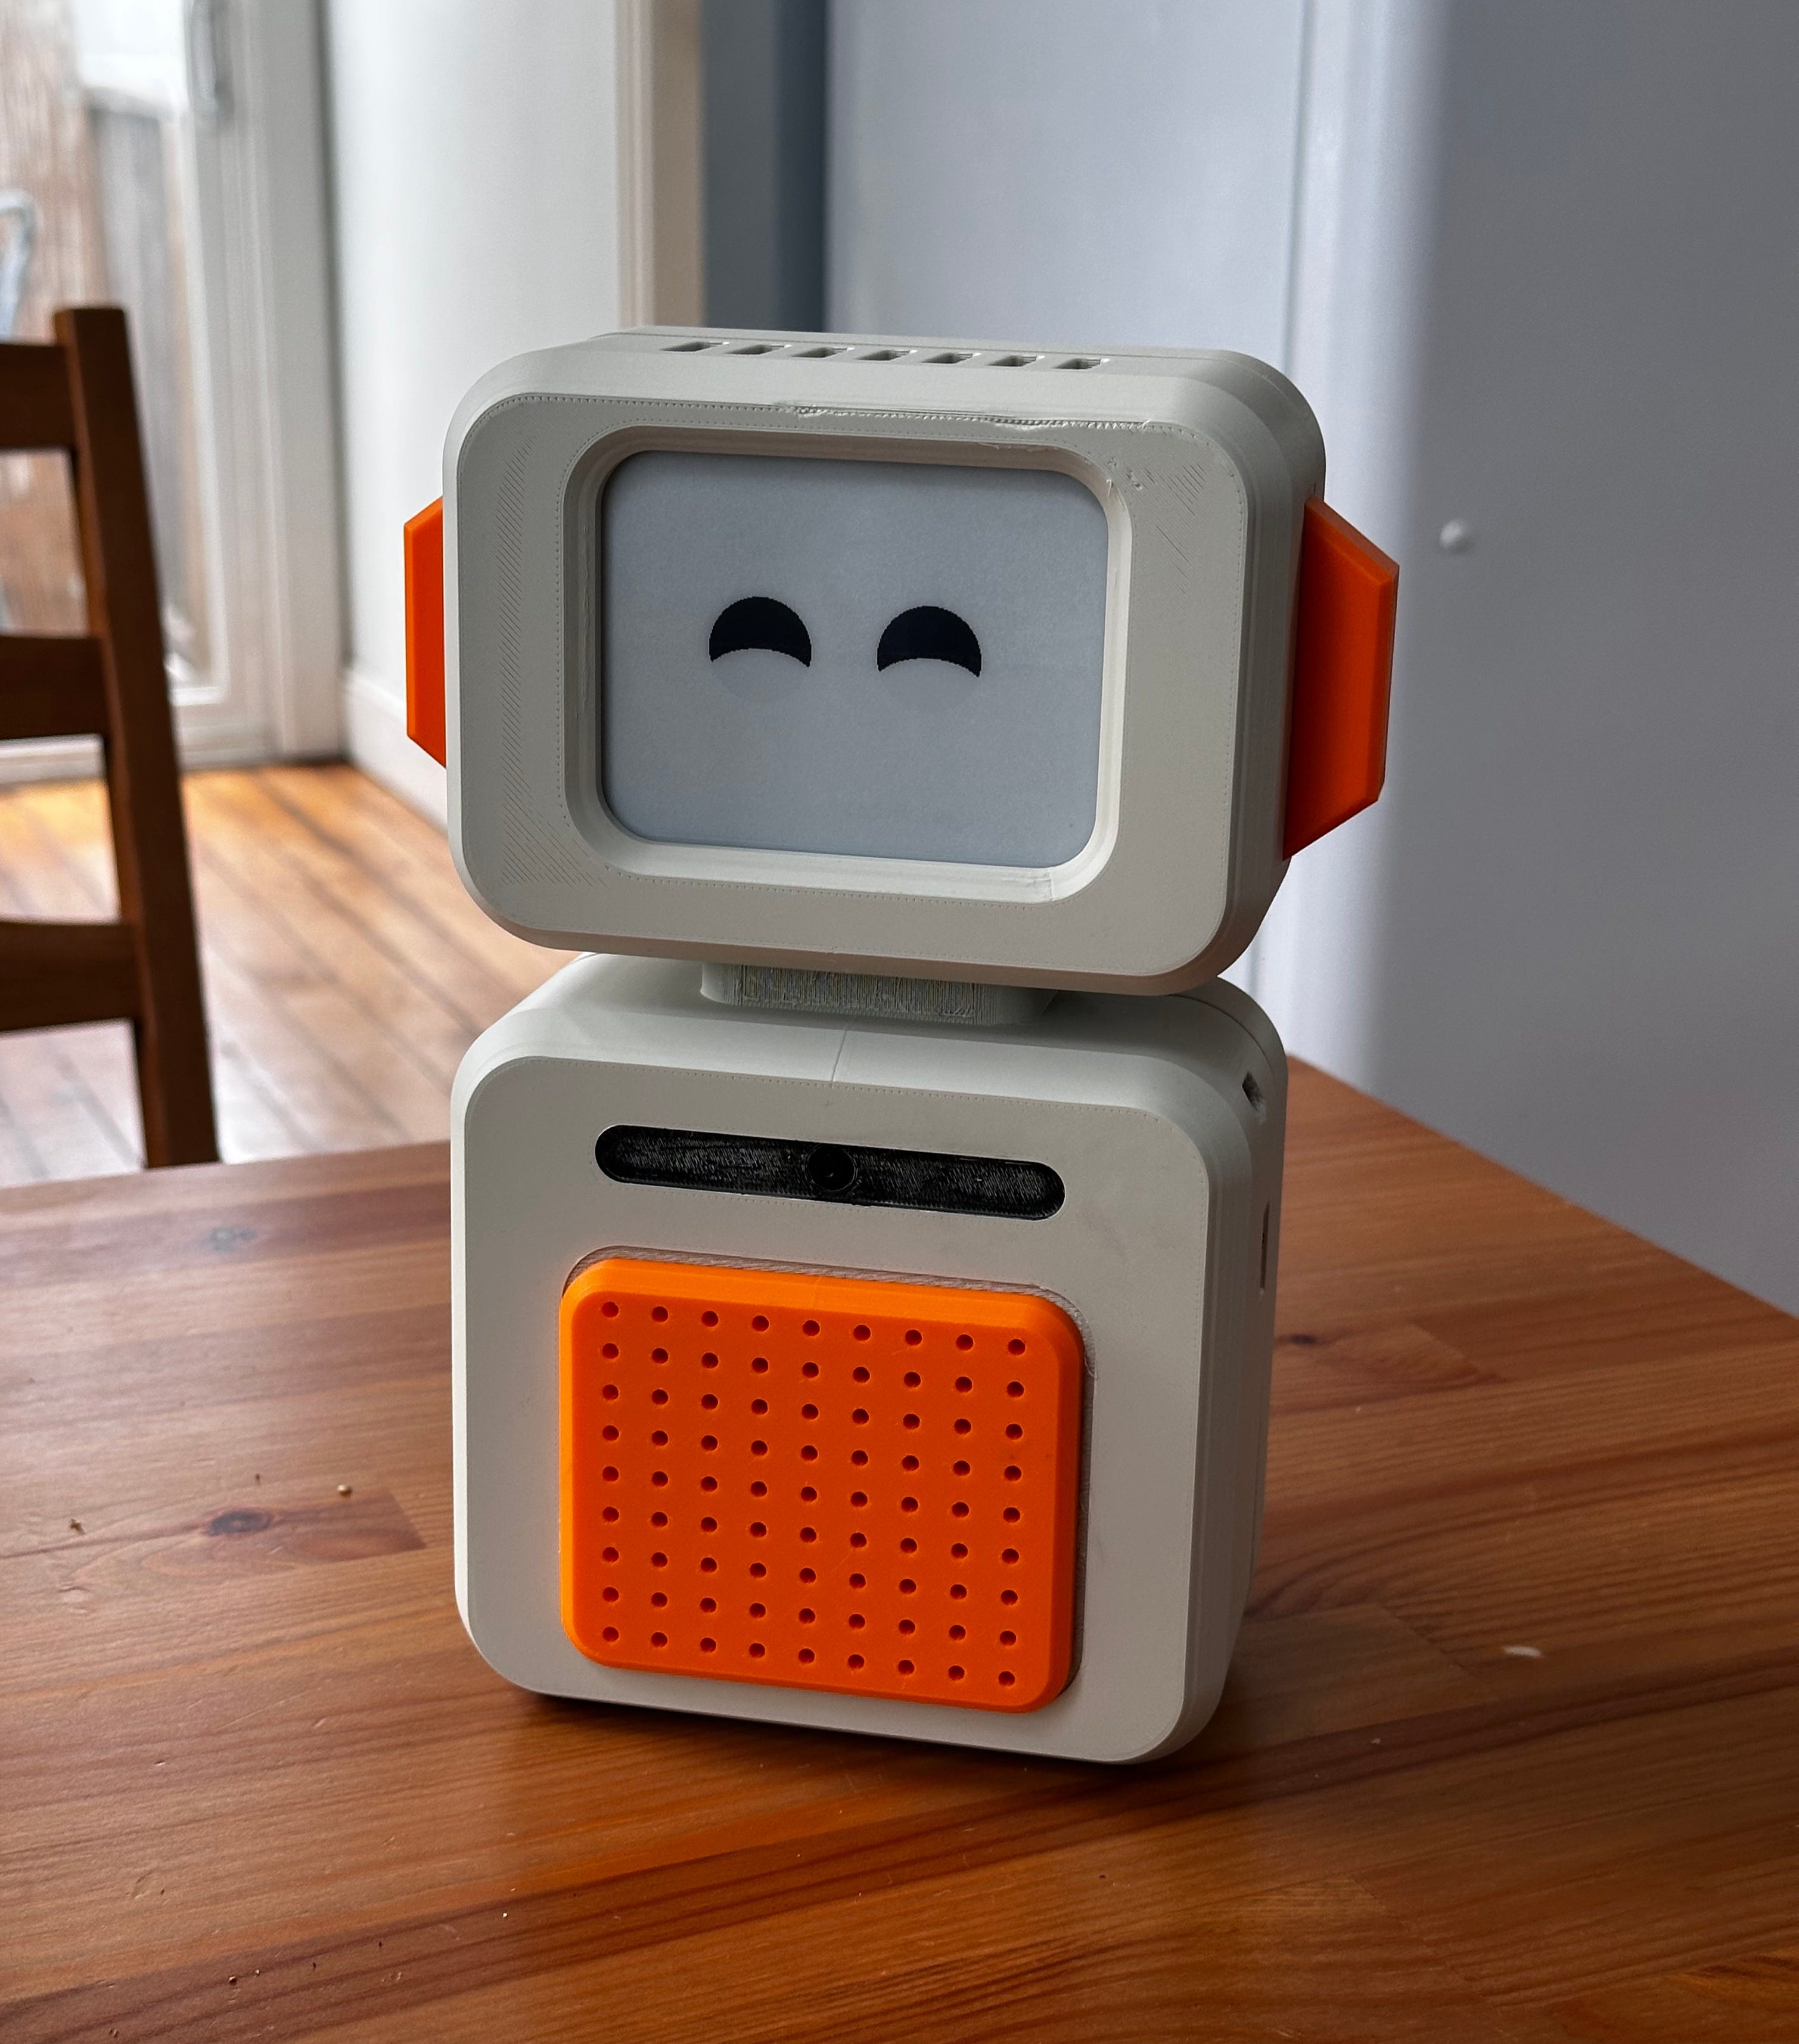
At Fable, we don’t buy that story. We build like we’re coding: tiny loops, constant feedback, and tools that collapse latency from idea → interaction. Last week, we prototyped a cute, AI‑powered companion robot in three days. It talks, sees, reacts with an expressive E‑ink face, plays audio through dual speakers, and runs an on‑device AI pipeline on a Raspberry Pi 5.
This post breaks down the playbook we used — from napkin sketch to a functioning desktop companion — and the principles that let us move at this pace consistently.
TL;DR — The 72‑hour sprint
Day 0 (evening) — Define the vibe; quick creative seeding (ChatGPT prompts, Midjourney moodboard).
Day 1 — Sketch → AI render (Vizcom / Higgsfield) → CAD in Fusion 360 → first 3D‑print starts overnight on Bambu X1C.
Day 2 — Solder & wire electronics; bring‑up on Raspberry Pi 5; vibe‑code firmware/behaviors in Cursor; first “face + voice” loop.
Day 3 — Vision + conversation pipeline; polish shell; tune expressions; desk demo that delights.
Hardware spec we hit in 72h:
4.2" E‑ink display (expressive face)
Dual speakers
Microphone
Camera
Battery‑powered
USB‑C charging
Wireless (Wi‑Fi + Bluetooth)
Core capabilities:
Conversational agent (LLM‑backed dialog + local TTS)
Sees & understands (camera → vision model → behavior)
Face expressions (E‑ink sprites + states)
Delightful, compact design (desk‑friendly form, kid‑safe edges)
Step 1 — Sketching & conception (ChatGPT, Midjourney)
We start by writing the product into existence:
Constraints: intended age range, desk footprint, safe edges, battery target, and the “jobs” we want the device to do (homework helper, story mode, curiosity Q&A).
Prompts: ask ChatGPT for naming directions, interaction beats, and component envelopes (E‑ink module dimensions, speaker cavity volume ranges, camera FOV). The goal is to generate seeds, not specs.
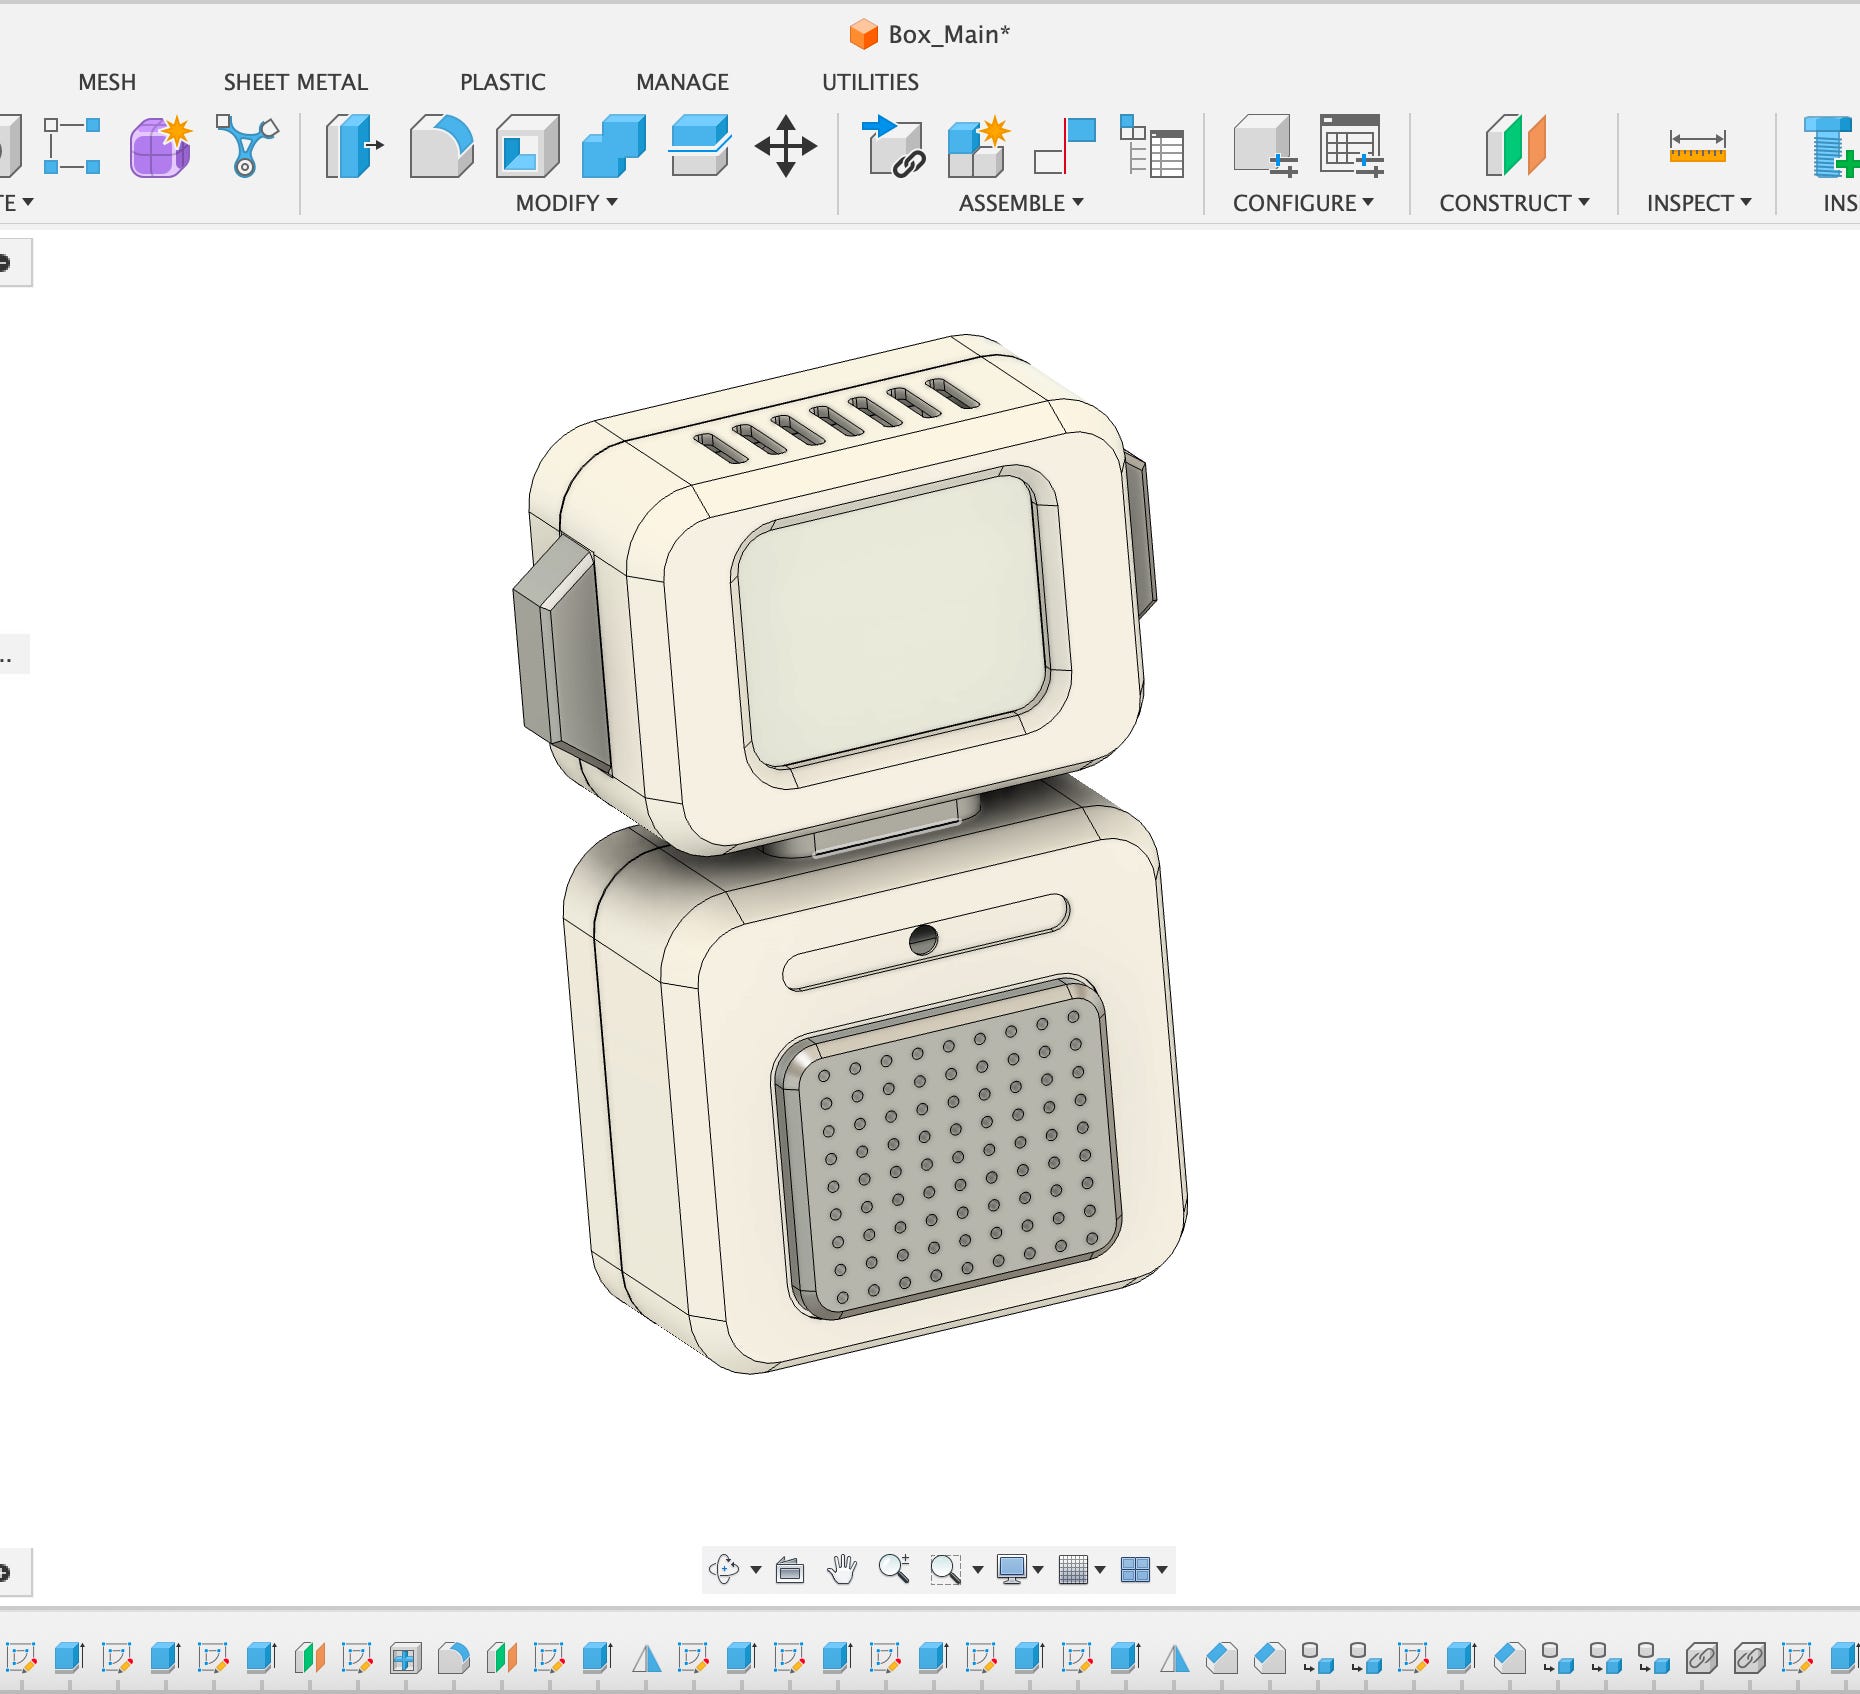
Moodboard: Midjourney for CMF vibes and silhouettes. We try 20–30 variations, pick 2–3 strong shapes, and freeze the vocabulary: soft cube, friendly eyes, minimal seam language.
Outcome: 2–3 “north‑star” sketches that anchor proportion and personality.
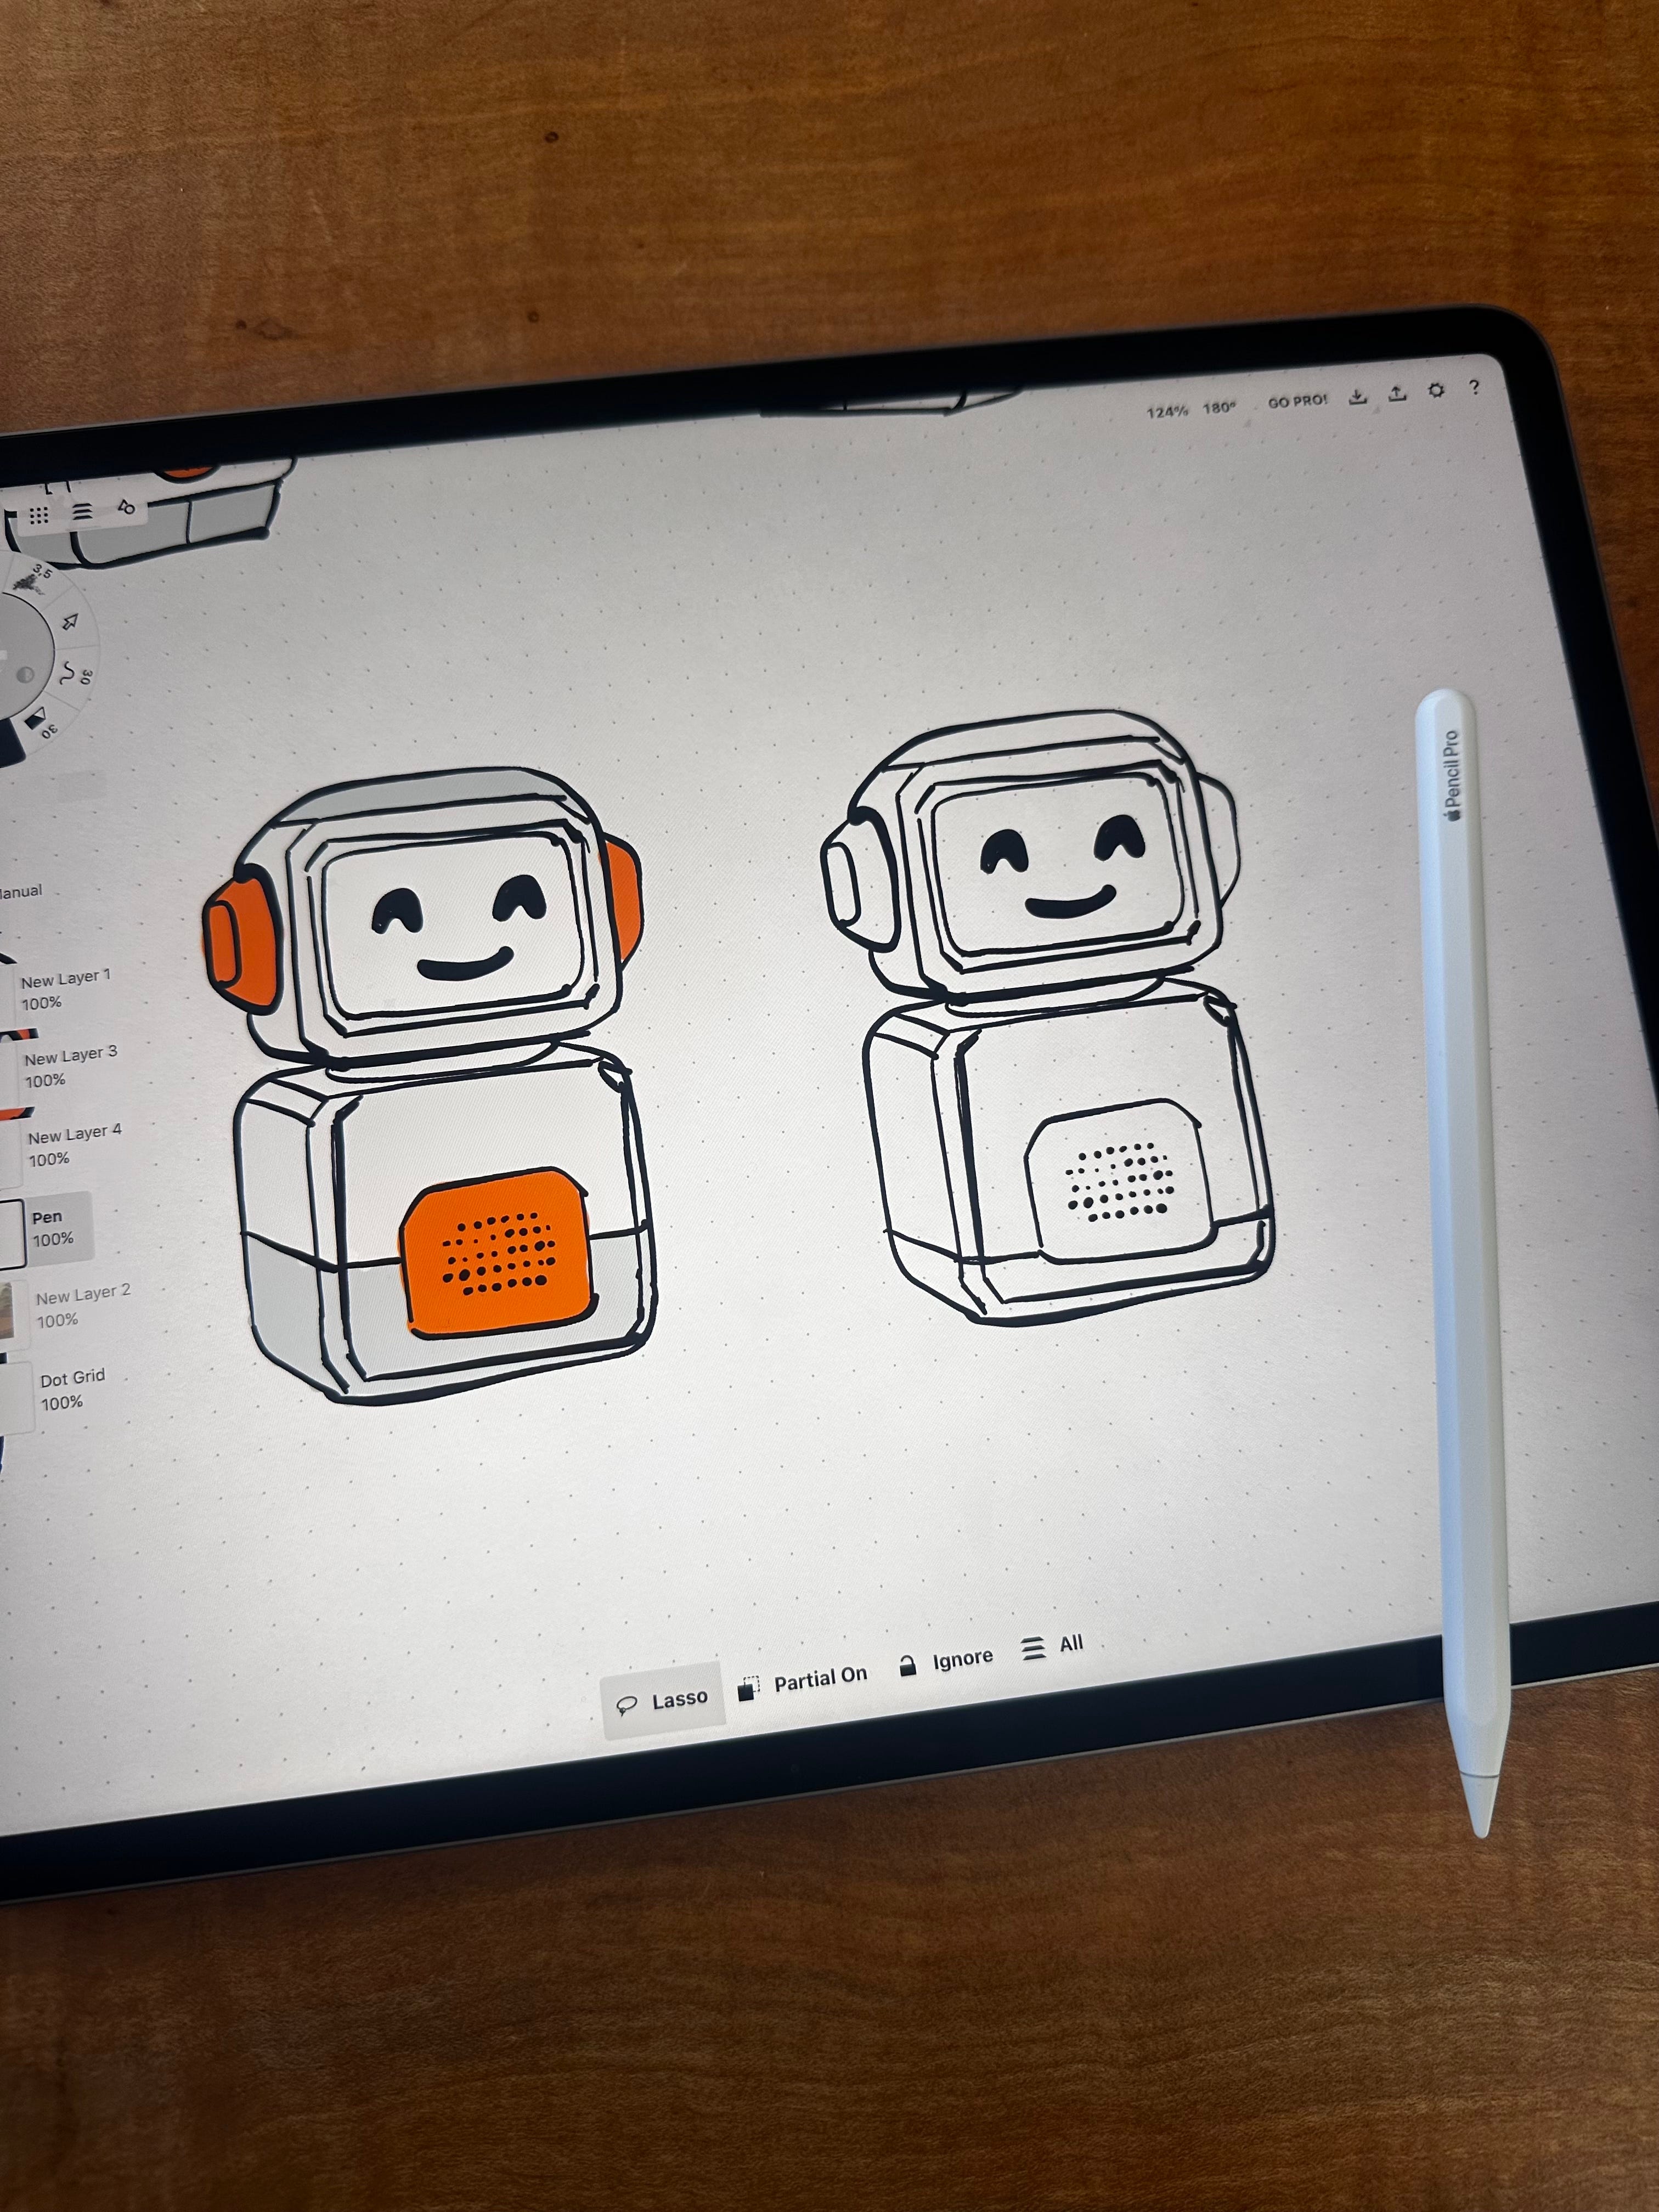
Step 2 — AI‑powered sketch rendering (Vizcom, Higgsfield)
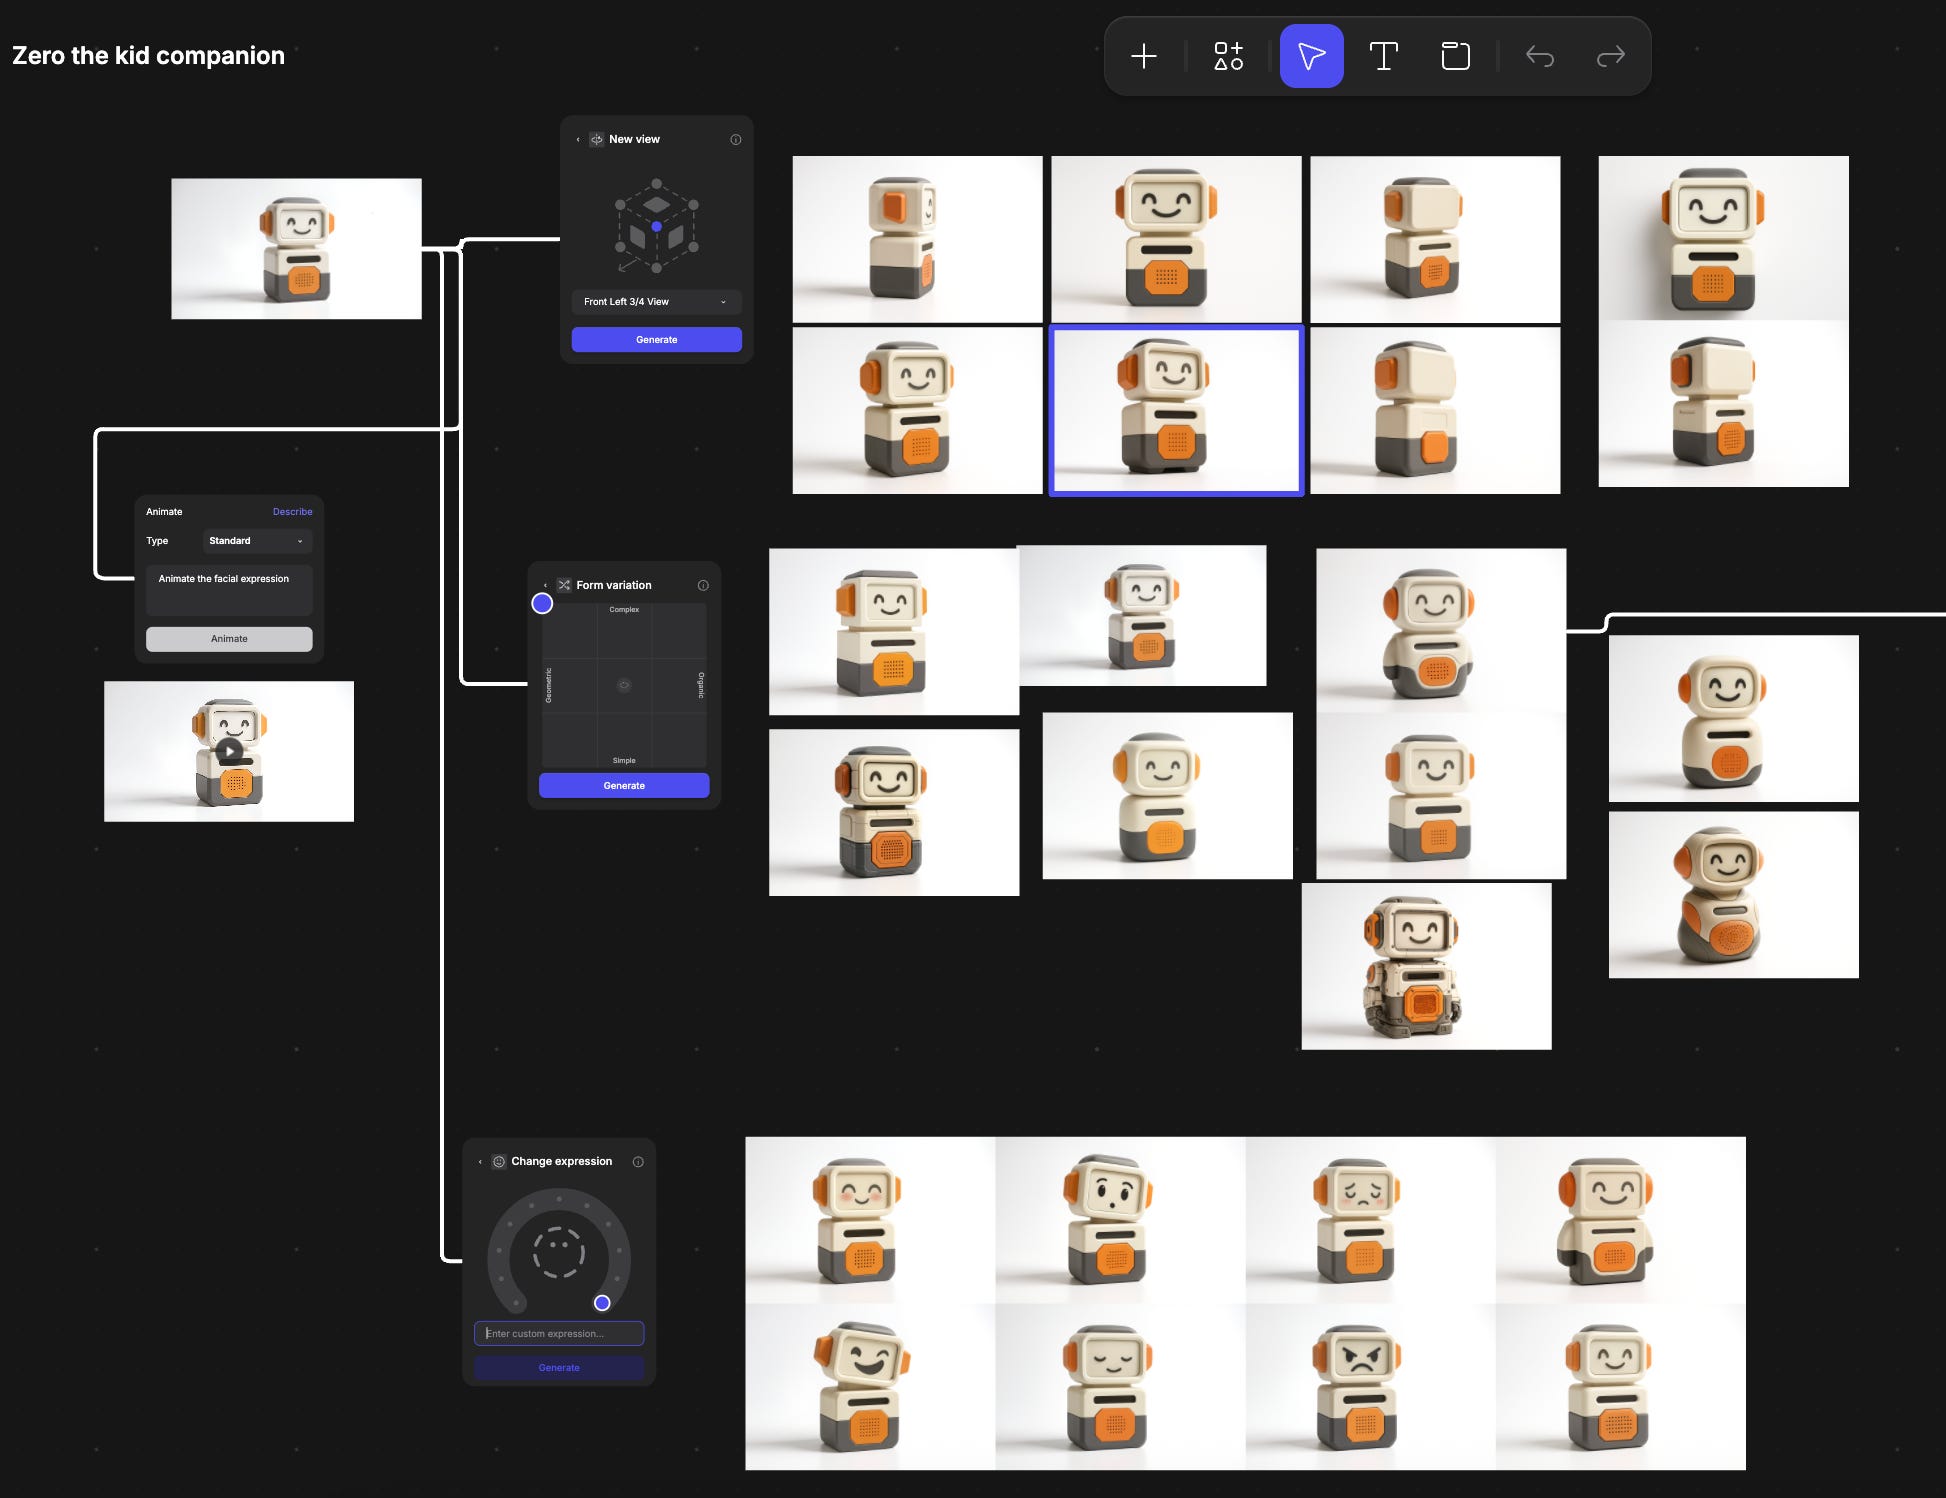
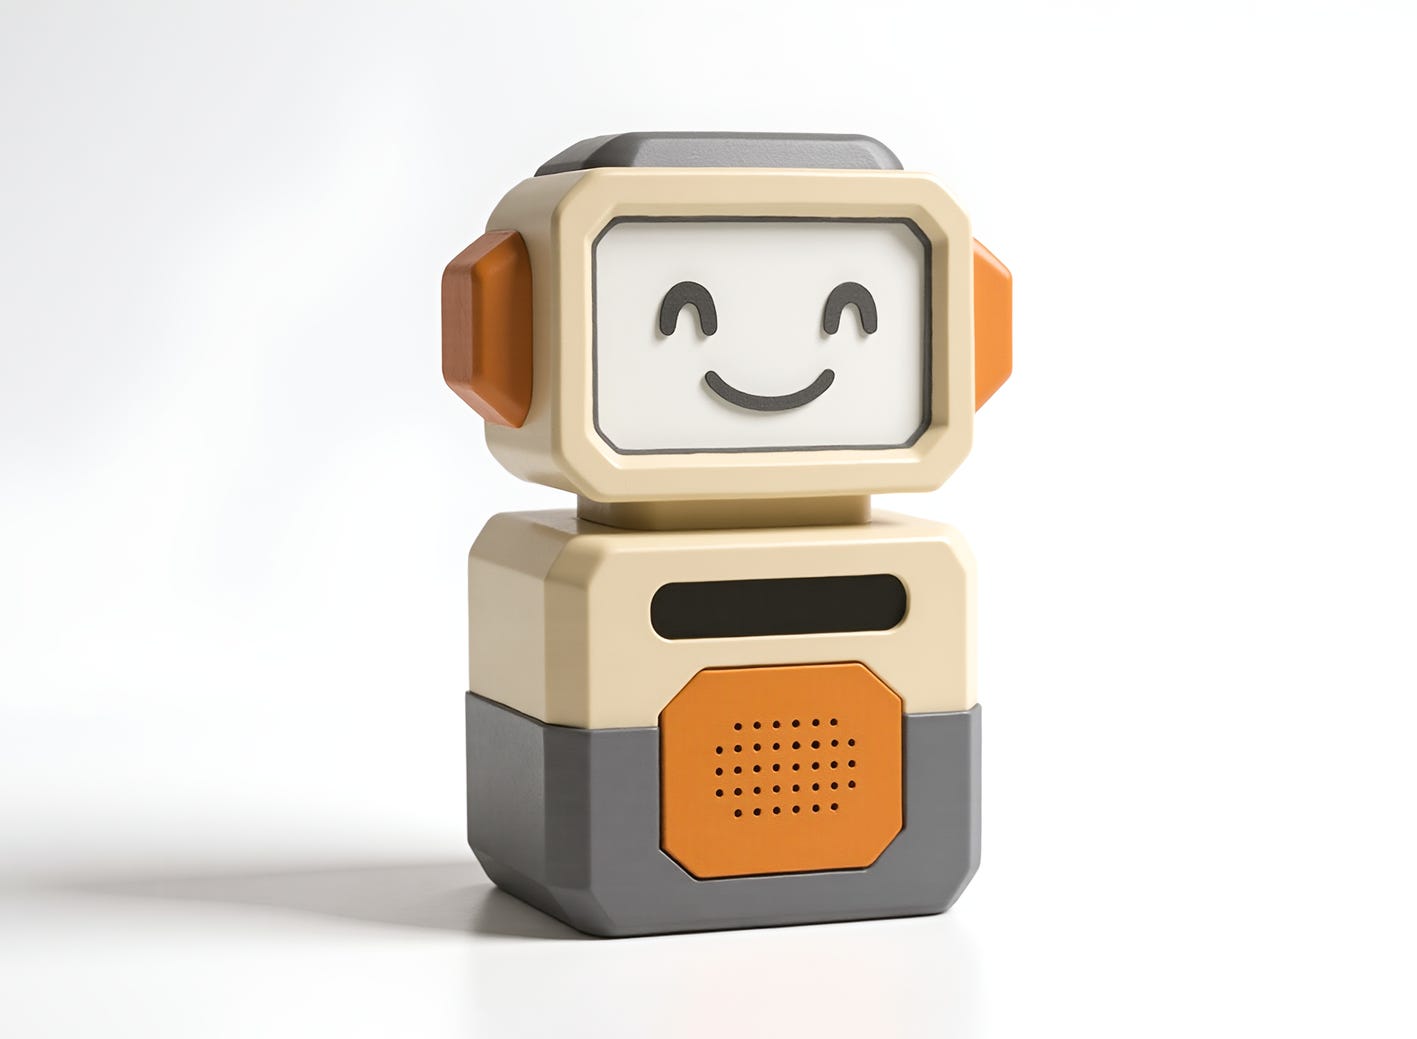
Paper lines become near‑photoreal in minutes:
Vizcom to lift linework into a shaded, material‑aware render.
Higgsfield for quick perspective and lighting variations, testing different E‑ink bezels, grills, and cut lines.
Why it’s fast: within an hour we see how edges catch light, whether the eye spacing reads as cute vs. uncanny, and where the seams should actually be. That lets us fix proportion before CAD.
Step 3 — CAD that respects the vibe (Fusion 360)
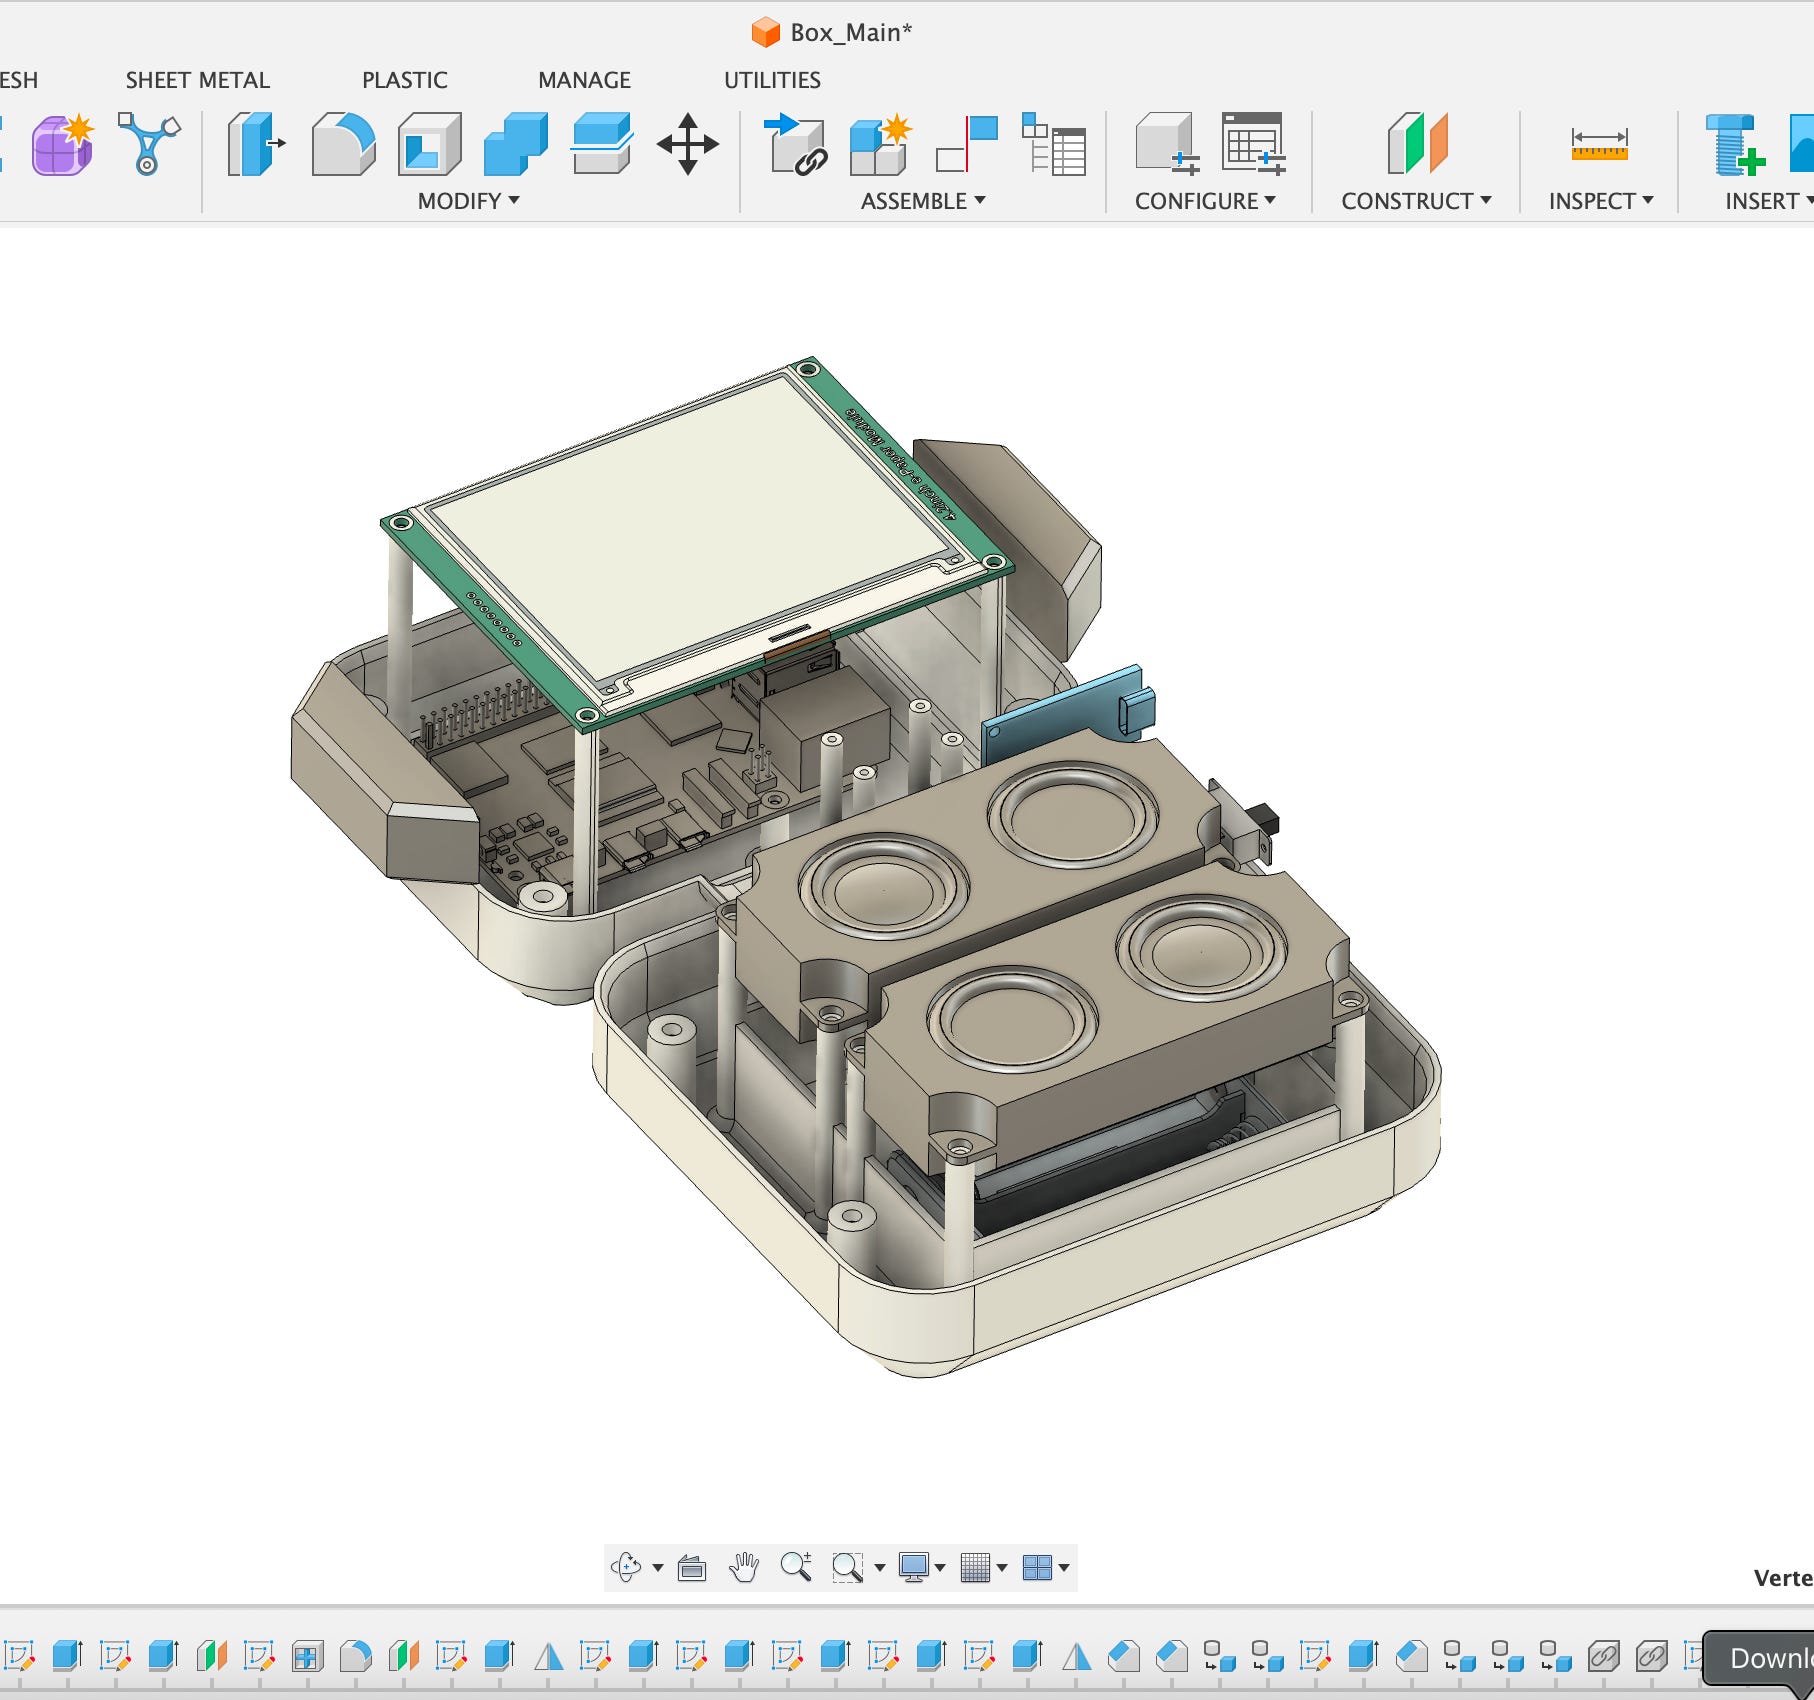
We block the shell with a parametric model:
Define master parameters: wall thickness, display inset, speaker cavity, camera standoff, fillet radii.
Design internal rails/bosses for fasteners and a serviceable split‑shell.
Reserve a straight‑through cable corridor and battery bay.
Export STLs with generous chamfers for friendly assembly.
Rule of thumb: if it can’t be printed, assembled, and re‑opened today, it’s too clever.
Step 4 — Print & solder at sprint pace (Bambu X1C + bench)
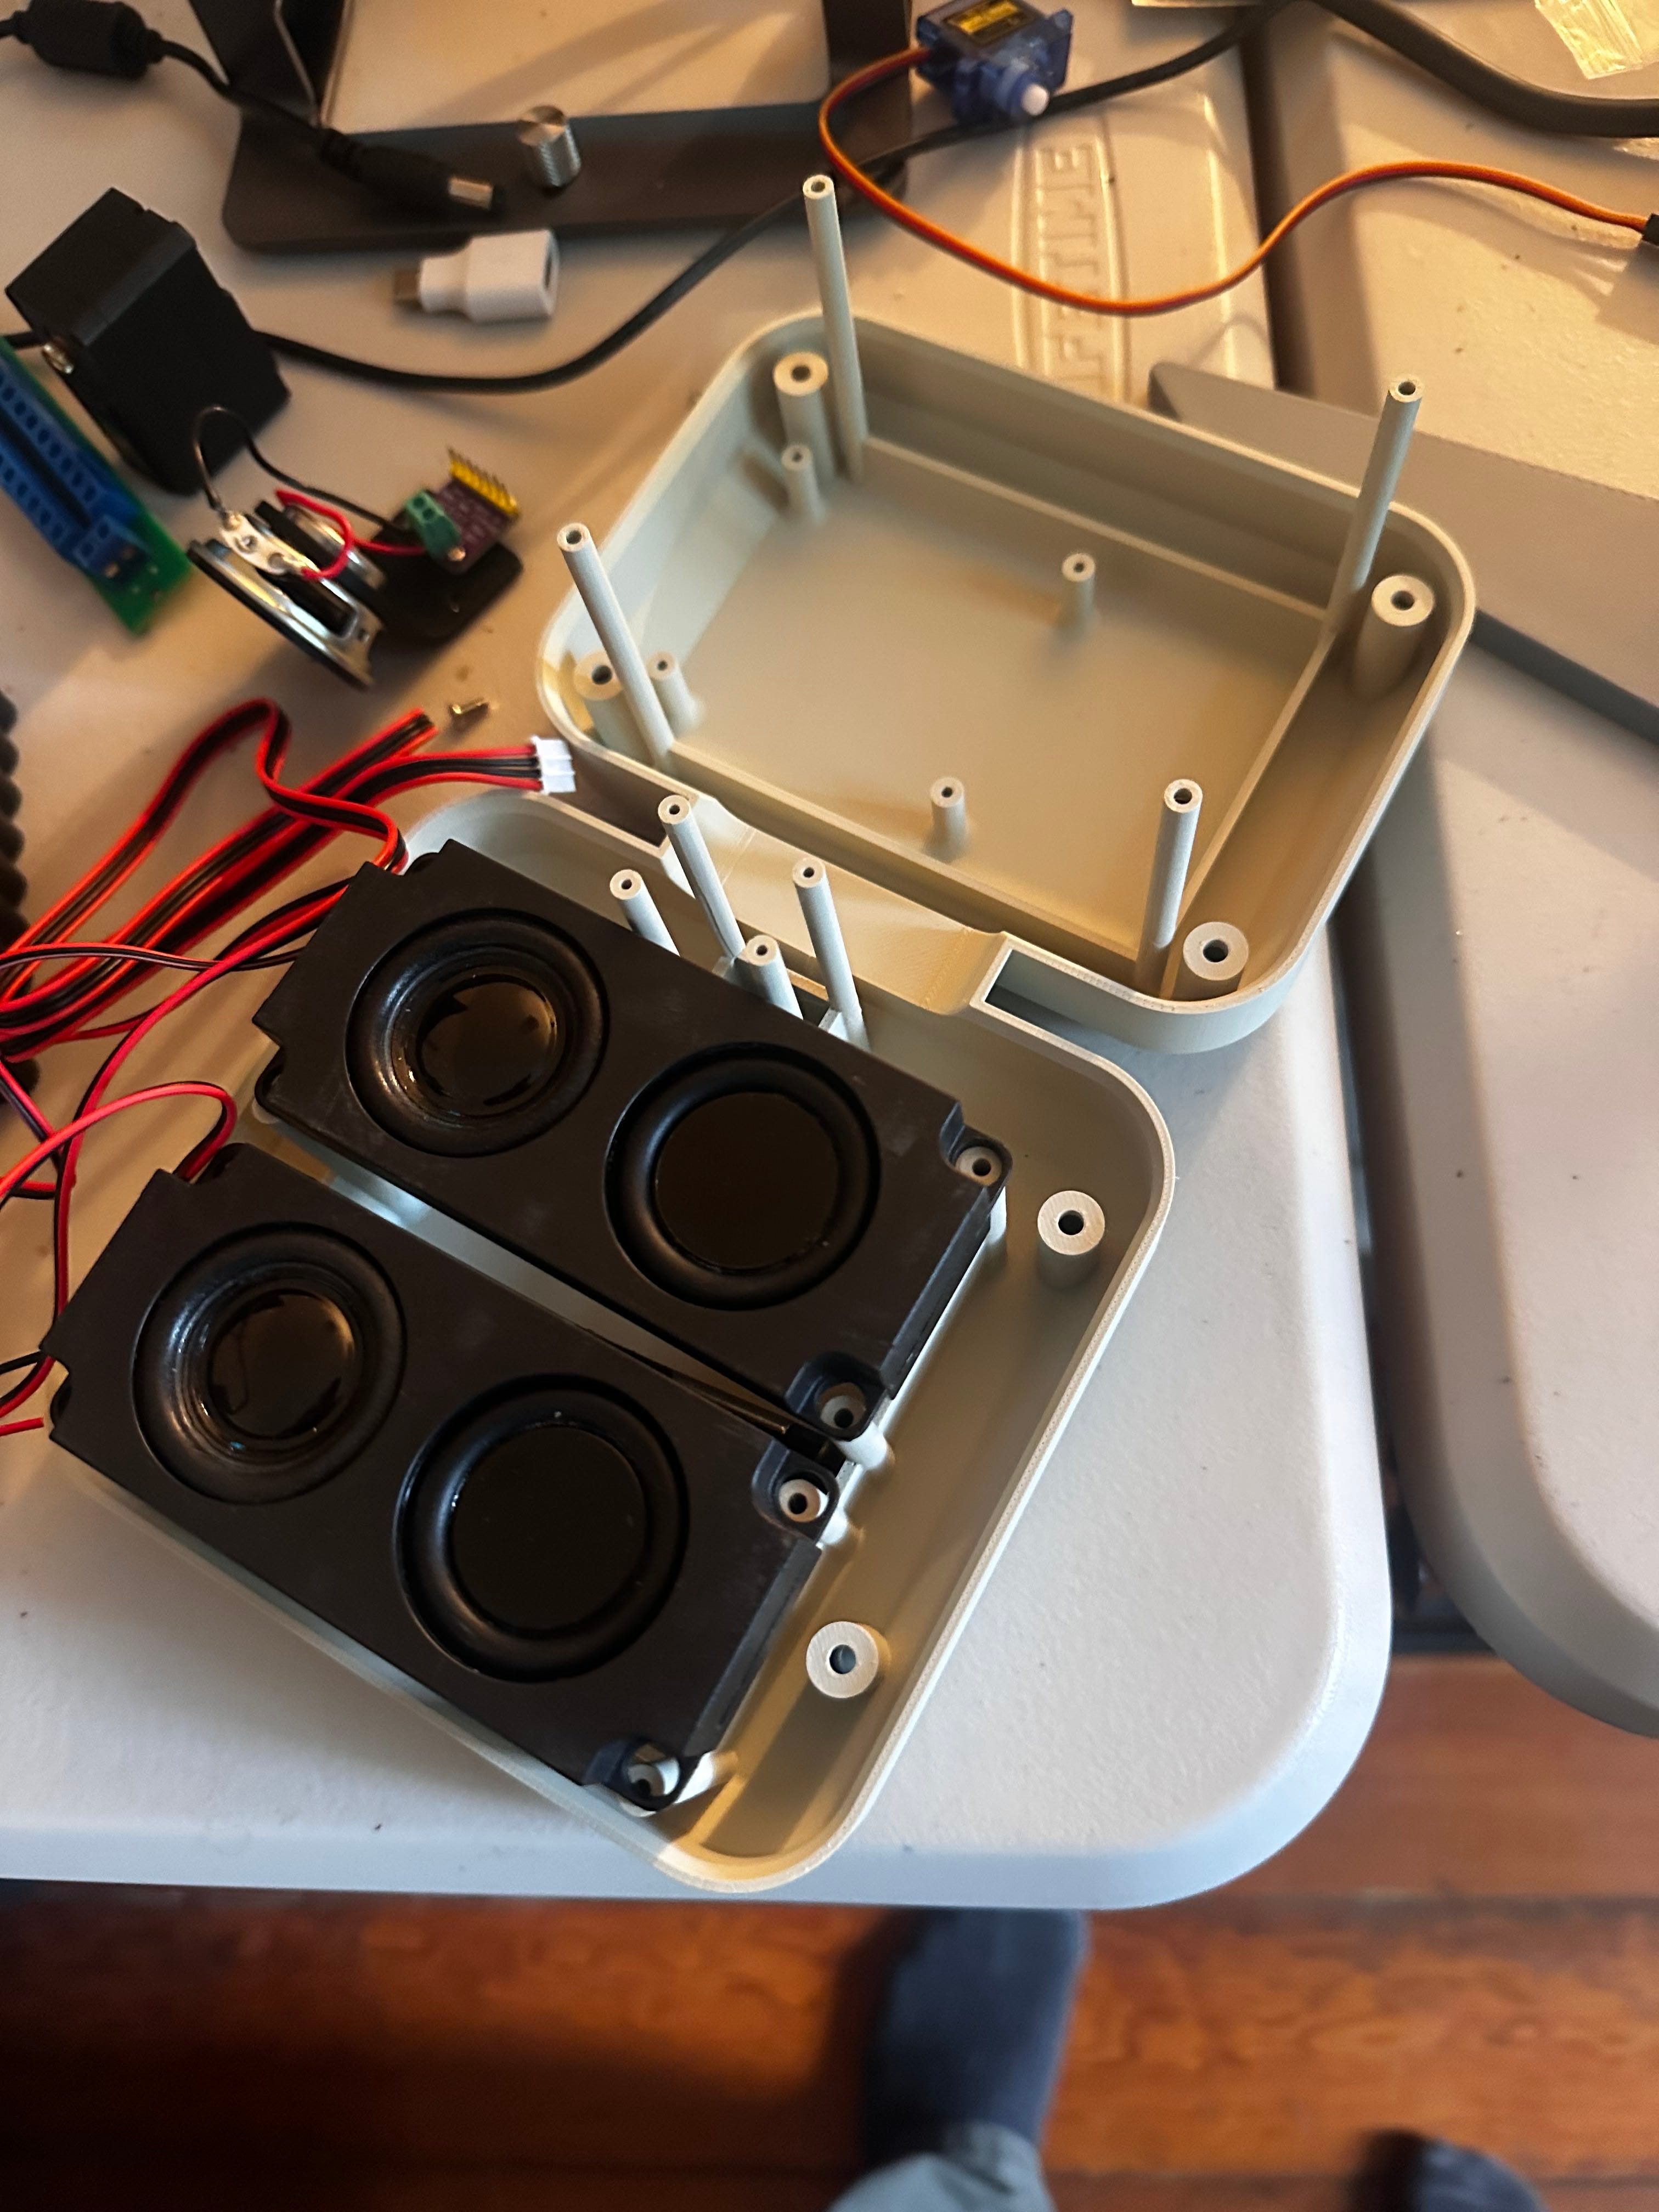
Bambu X1C: slicer preset, 0.2 mm layer height, 3 perimeters, 15–20% gyroid infill. Large shell prints overnight; small brackets run in parallel.
Finishing: minimal supports, fillets that hide layer lines, and friction‑fit checks while the next pieces print.
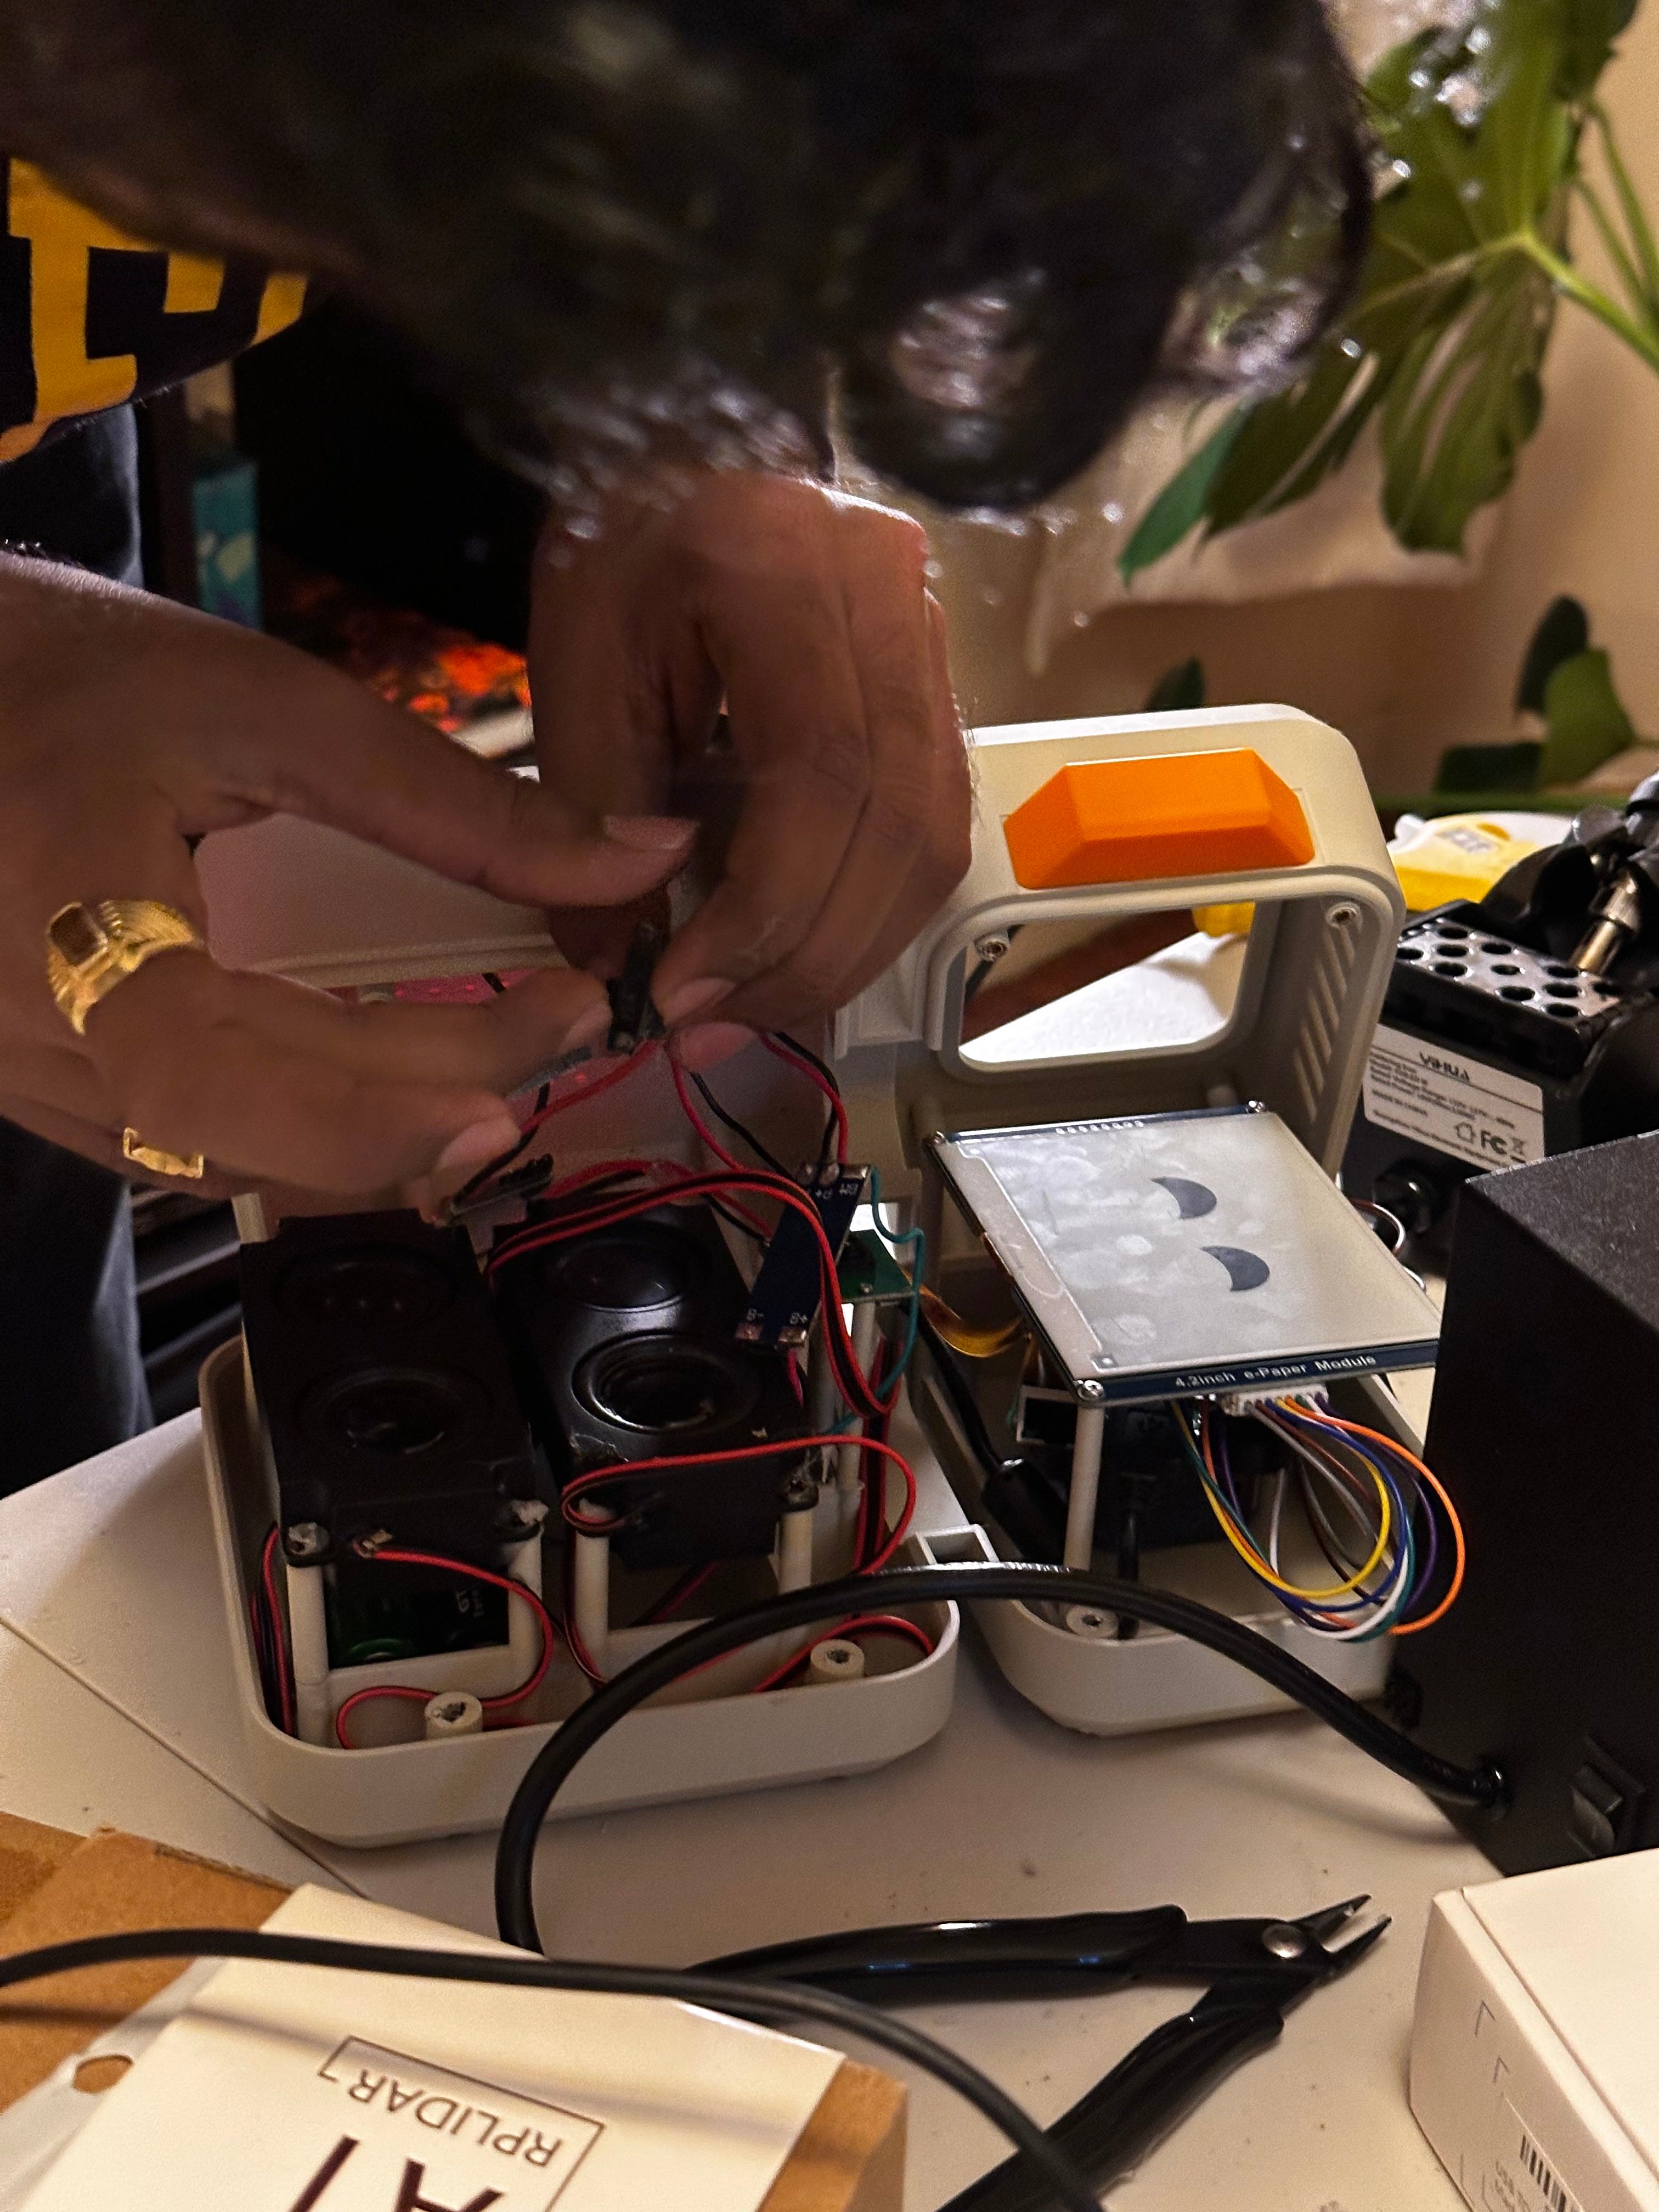
Electronics: wire harness first, then modules: E‑ink + driver, dual speakers + small amp, digital mic, camera, battery pack/PMIC, USB‑C for charge/power, and a Wi‑Fi/BLE host (RPi 5).
Golden path: design around known‑good dev modules for the first pass. Custom PCBs come later — after the concept has proven the feel.
Step 5 — Vibe‑coding the brain (Cursor on Raspberry Pi 5)
Treat the robot like a web app with live behaviors:
Cursor helps stub services fast: ASR, LLM, VLM, TTS, face engine, audio player.
A message bus (simple local pub/sub) ties everything together:
mic → ASR (transcript events),
camera → VLM (scene tags),
LLM (intent/state),
face engine (E‑ink sprites),
audio player (voice/music),
BLE/Wi‑Fi (pairing & updates).
Hot‑reload small loops: tweak a threshold, swap a sprite, retest instantly — the hardware equivalent of refreshing a dev server.
The result: by the end of Day 2 we had the first adorable loop — the robot sees you, smiles on E‑ink, and says hello.
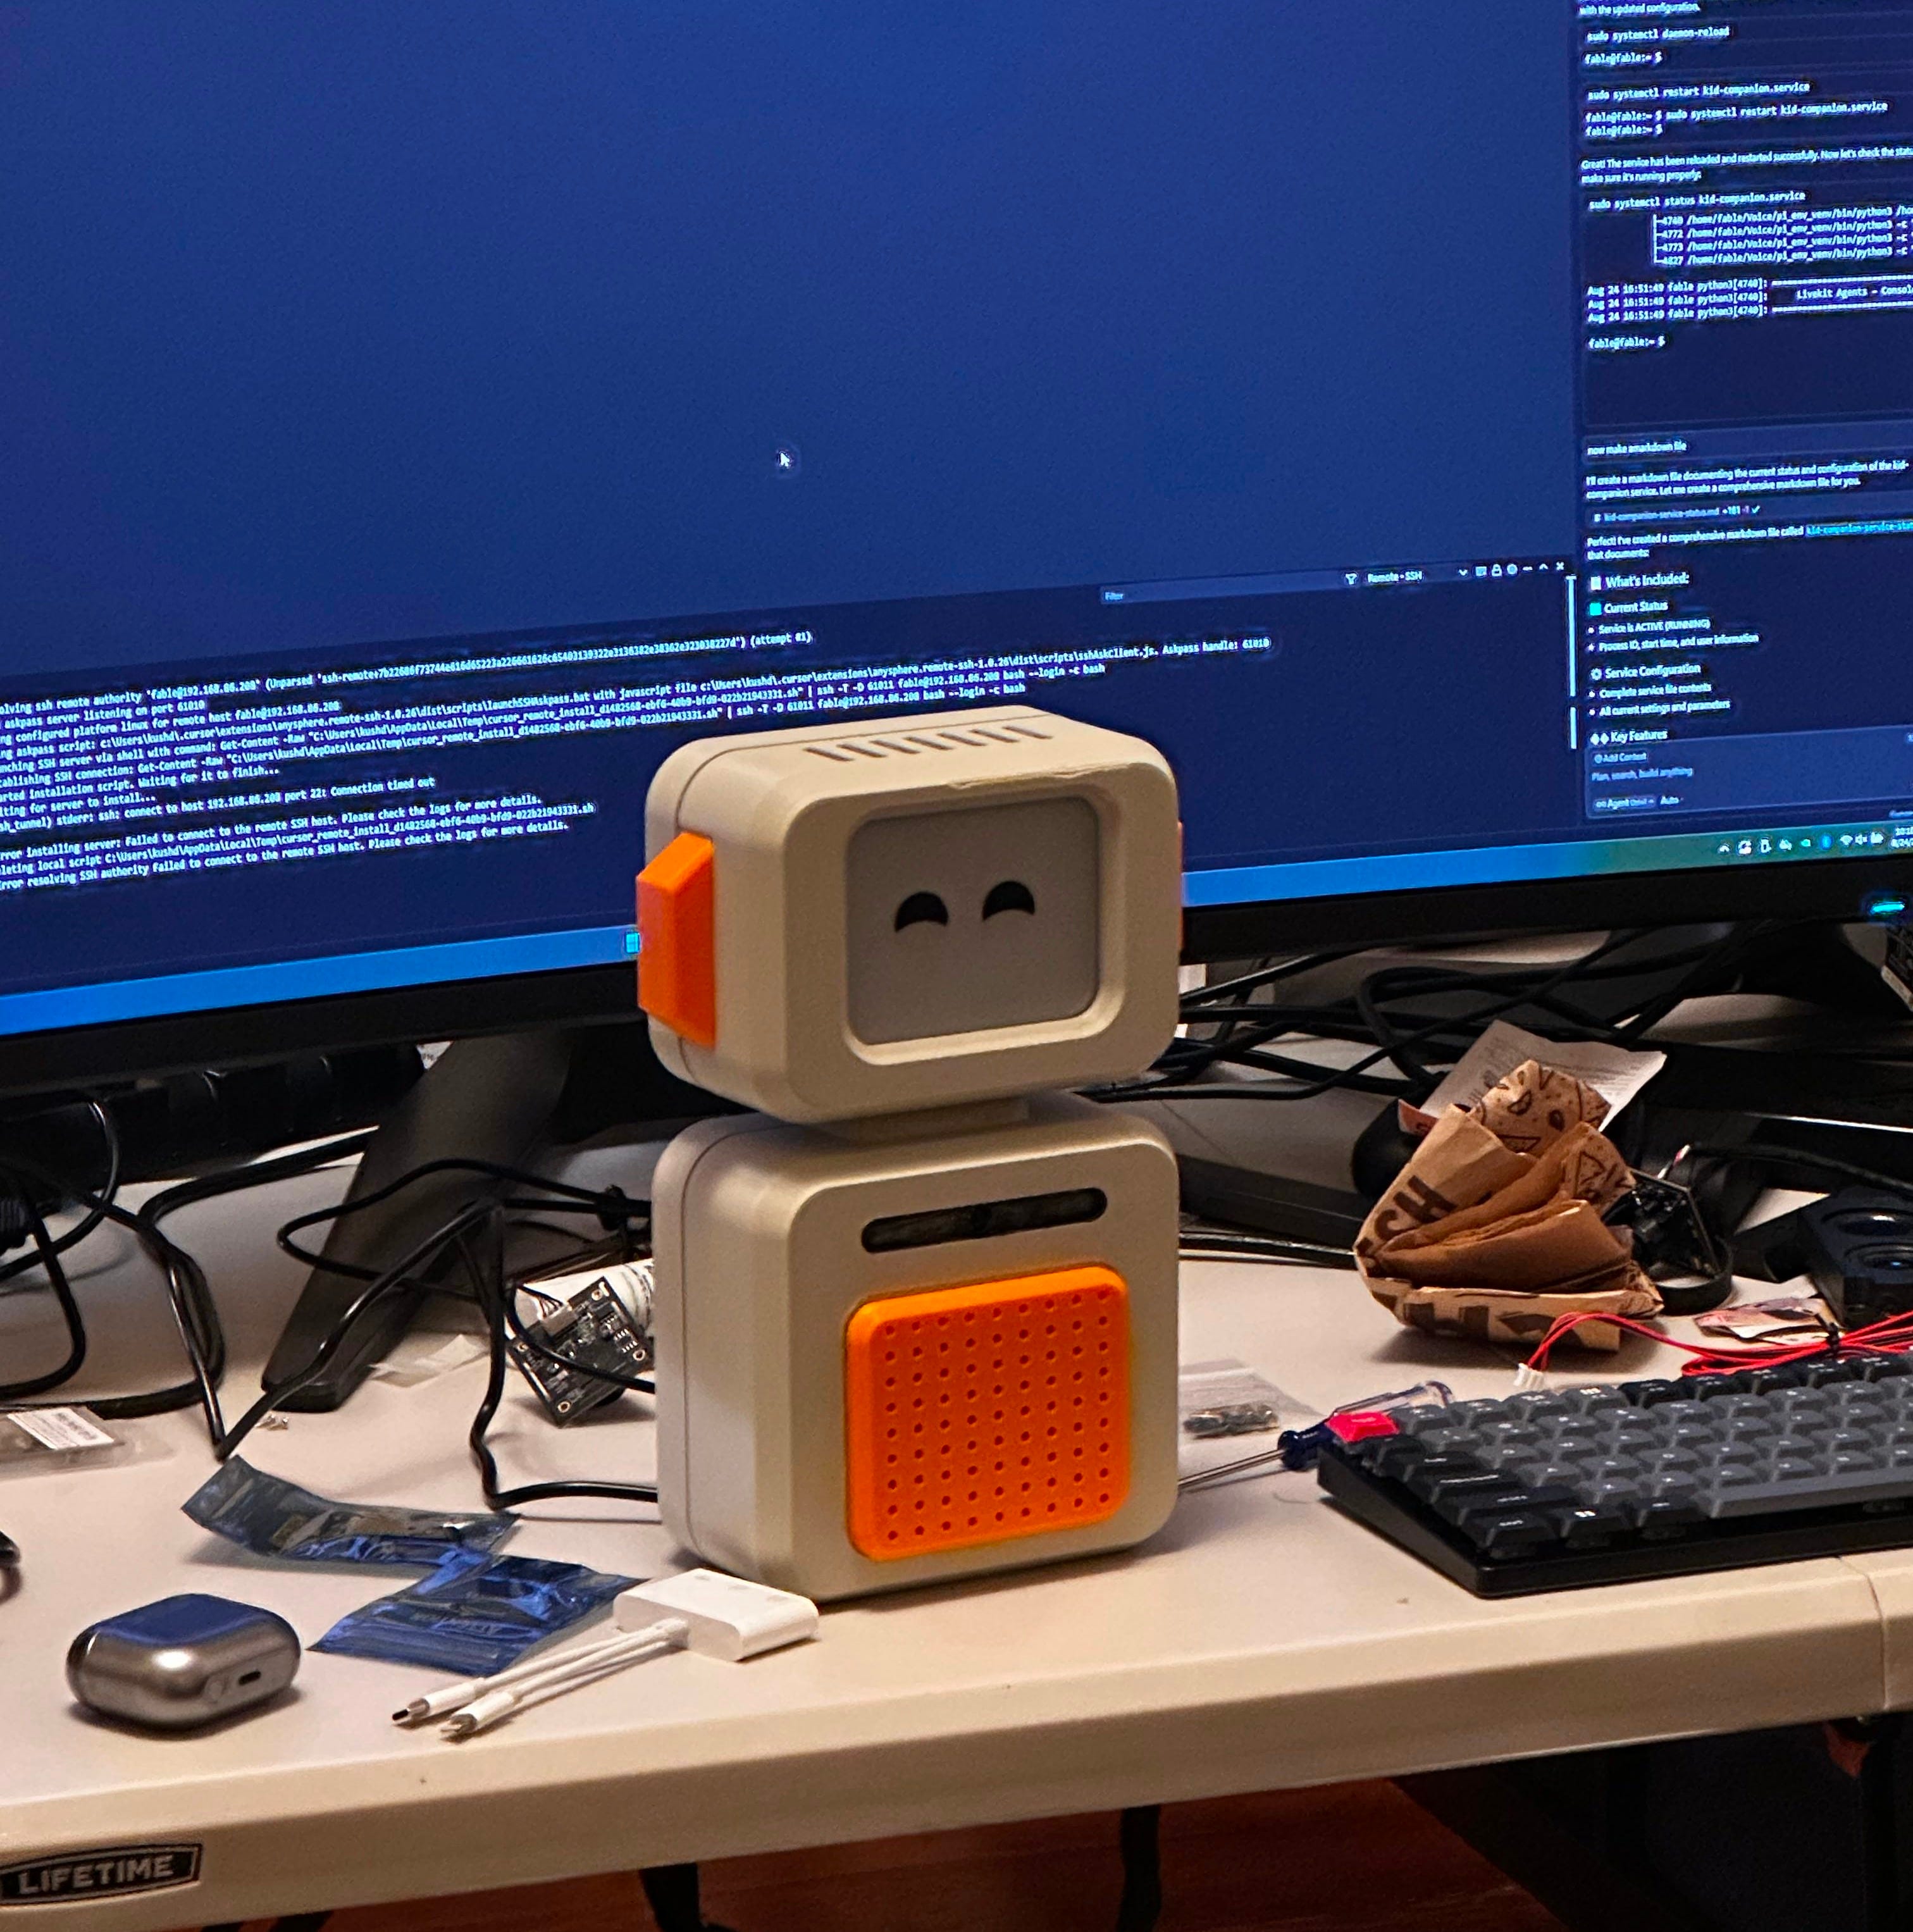
The working prototype (what it actually does)
Converses — Voice in, natural replies out. Parents can set time windows and modes (homework, story, free play).
Sees — Camera cues shape behavior: lean in, wave, hold up a worksheet, it responds.
Expresses — E‑ink swaps between eyes/mouth sprites for idle, happy, focused, thinking, sleepy.
Plays — Dual speakers for voice, music, and ambient sounds.
Moves (lightly) — Not mobile yet; it’s desk‑friendly and meant to be a calm presence.
It’s not the final product. It’s a fast, lovable proof that the core loop is fun and useful — the bar for any concept to earn more engineering.
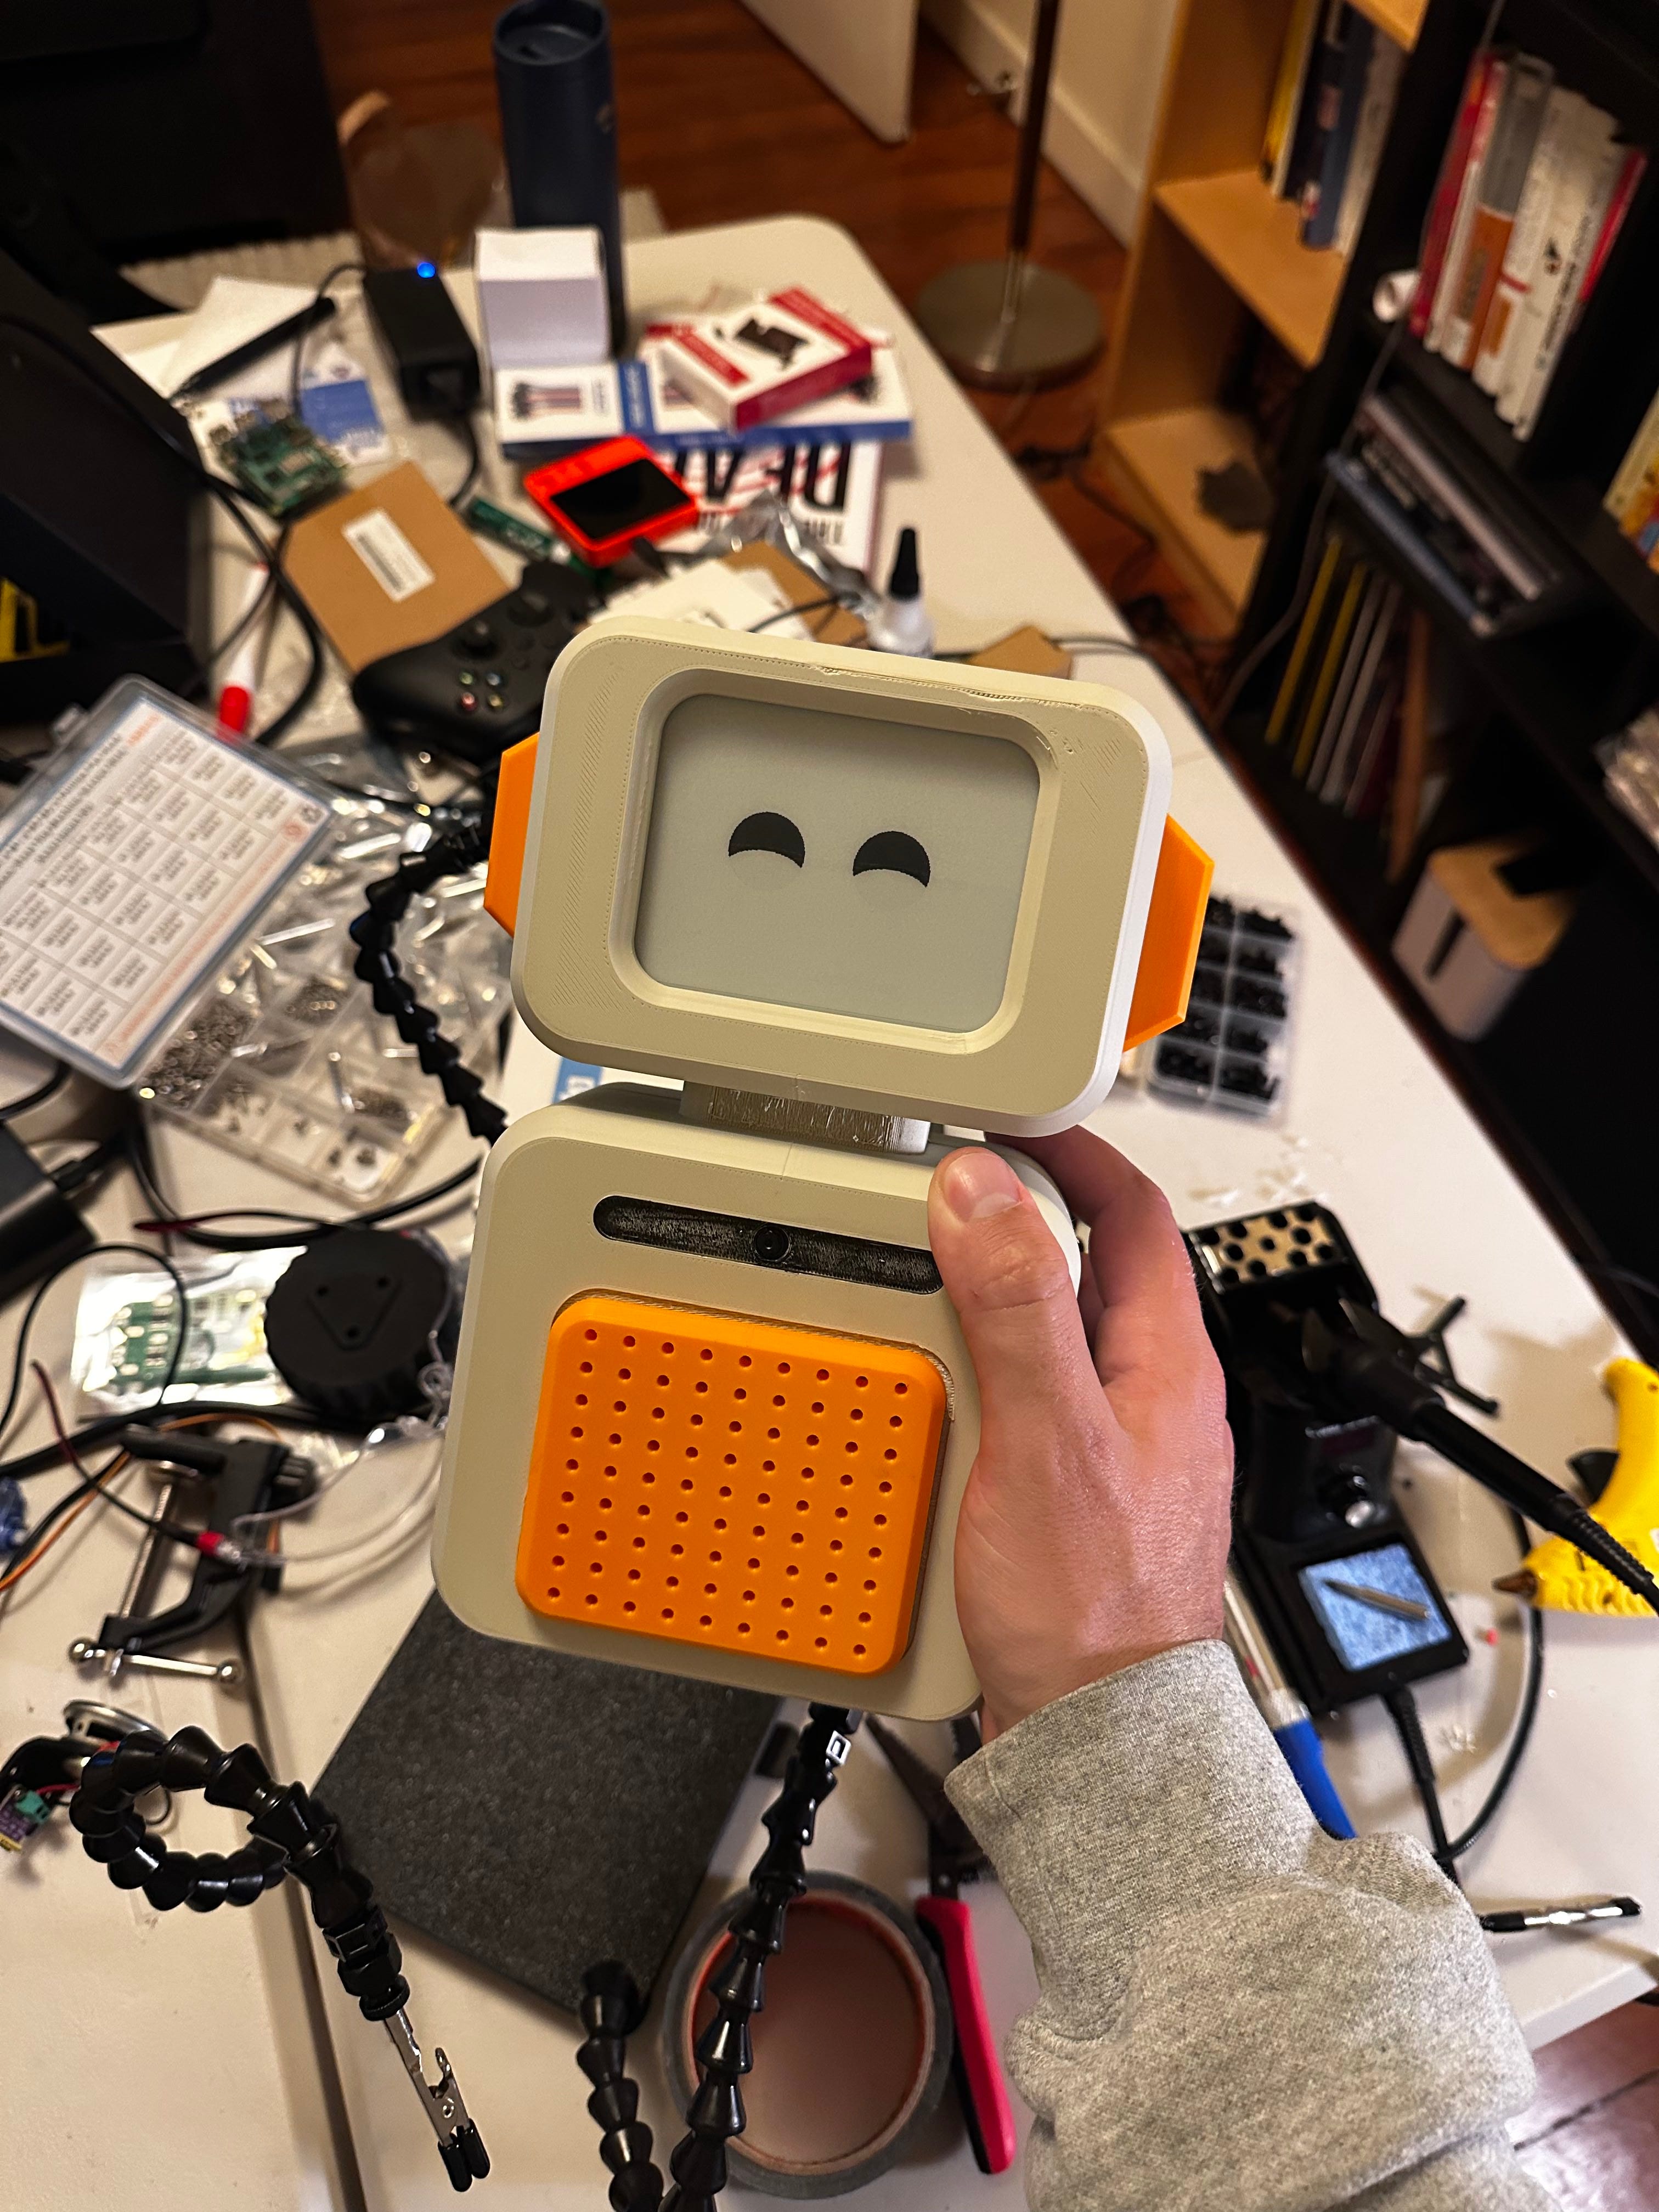
Architecture at a glance
Compute: Raspberry Pi 5 (Linux) running Python services.
I/O: digital mic → ASR, camera → vision tags, buttons/touch for mode, E‑ink over SPI/I2C, speakers via simple amp.
Inference: lightweight local models where possible; LLM/VLM calls with guardrails; caches for sprites/voices.
State: event‑driven controller (finite states + timers).
Connectivity: Wi‑Fi for updates and content; BLE for pairing.
Power: battery pack with charge management over USB‑C.
The meta‑skill: compressing loops
What actually makes this fast isn’t any single tool — it’s how they reduce latency between questions and answers:
Does this silhouette read as friendly? → Vizcom/Higgsfield in 10 minutes, then fix the sketch.
Will the E‑ink face feel alive? → a dozen sprites and a tiny state machine, hot‑reloaded in minutes.
Is the shell printable and serviceable? → Fusion parameters + overnight Bambu run.
Does the device earn a place on a kid’s desk? → real‑world use the same week.
We build momentum by choosing defaults that keep the loop moving. Dead ends are cheap; wins are banked.
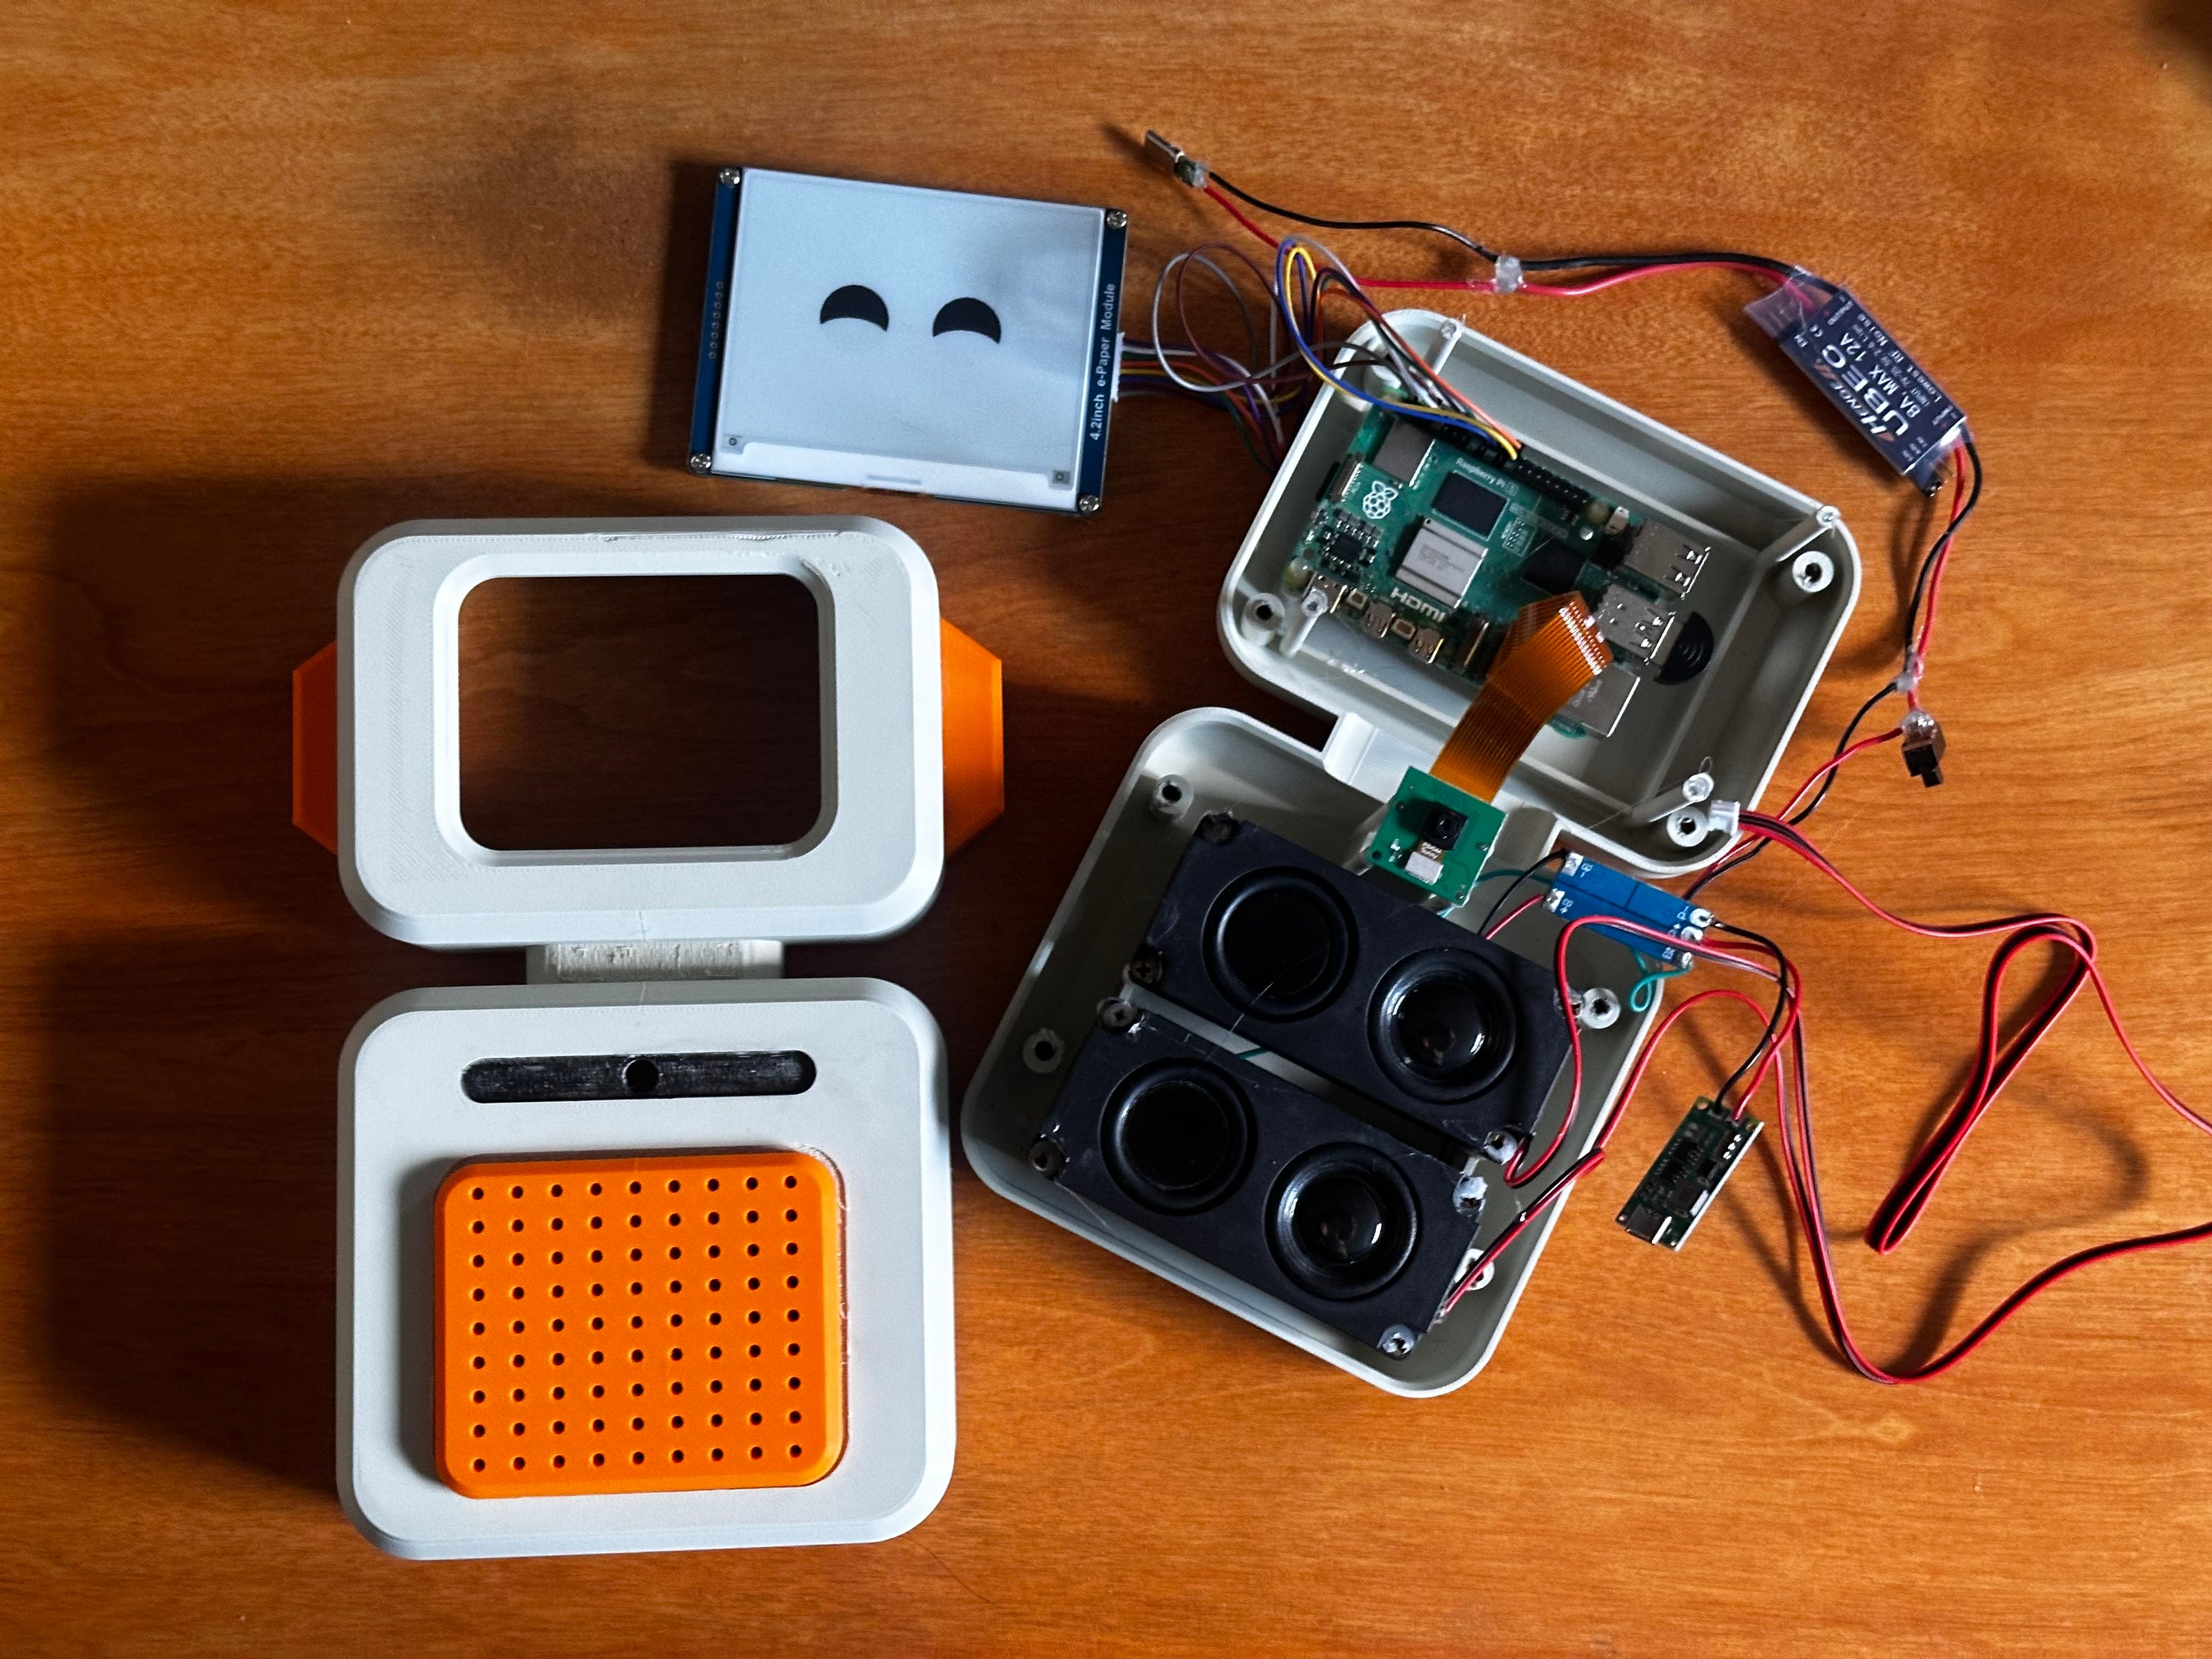
What’s next
We’re productizing the vibe‑coding for firmware approach into reusable blocks — sensors, faces, state machines, content hooks — so we can go from sketch to lovable prototype in one long weekend. The faster we can test ideas in the real world, the better our robots will feel at home.
If this kind of execution speed excites you — as a parent, an educator, or a builder — subscribe and follow along. We’ll share more internals, parts lists, and open patterns as we iterate.
Thanks for reading. If you’re a parent in the Bay Area who wants early access, or a collaborator who ships fast, book a call with me here
— I’d love to meet you.
Till next one,
Zero is super cute. Great job guys! Keep it up